How to Start a Straw Bale Garden: From Setup to First Harvest
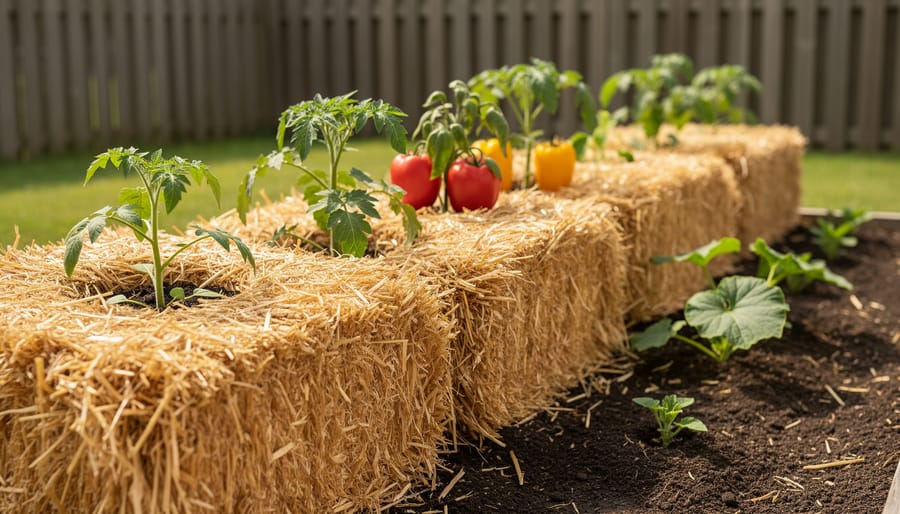
Straw bale gardening lets you grow vegetables directly in conditioned straw bales instead of traditional garden beds, creating an instant raised-bed system that works beautifully even on poor soil, concrete, or hard-packed ground. The method is straightforward: you buy herbicide-free wheat or barley straw bales (never hay), position them end-to-end with strings on the sides, condition them with water and nitrogen for about two weeks, then plant right into the decomposing straw. I discovered this technique three years ago when my backyard soil was hopeless clay, and by mid-summer I was harvesting tomatoes, peppers, and squash from bales that had essentially become self-contained growing environments.
The beauty of straw bale gardening lies in its accessibility. You skip the backbreaking work of tilling, amending, and building beds. The bales warm up earlier in spring than ground soil, extending your growing season on both ends. As the straw breaks down over the season, it creates rich compost while your plants grow, and that spent material becomes premium soil amendment for future garden projects. The setup does require some initial conditioning patience and attention to watering (straw dries out faster than soil), but the payoff is substantial, especially for gardeners dealing with problematic native soil, limited mobility, or small spaces like patios and driveways.
This season-extending method has gained serious momentum among gardeners looking for alternatives to traditional in-ground planting, and the technique works across most climate zones with proper variety selection and timing.
Why Straw Bale Gardening Works
I’ll be honest: I stumbled onto straw bale gardening by accident. A friend had extra bales after mulching her paths, and rather than haul them away, she planted tomatoes directly into them. By July, those plants were thriving while my in-ground tomatoes struggled with compacted clay. That was my lightbulb moment.
The science behind why this works is surprisingly straightforward. As bales as growing medium break down through microbial activity, they transform into nutrient-rich, self-contained planters. You’re essentially creating miniature raised beds without the lumber, soil hauling, or back-breaking prep work that no till gardening typically requires. The loose straw structure provides excellent drainage and aeration while retaining just enough moisture at the core. Roots penetrate easily, spreading through the decomposing material exactly as they would in premium potting mix.
Weed control is another game-changer. Because clean straw has few seeds you won’t spend hours pulling weeds like you would in traditional beds. Any stray sprouts that do appear wipe away with vinegar or pull out effortlessly from the loose bale. The elevated planting height also reduces bending, making this method ideal for gardeners with joint pain or limited mobility. And because bales warm faster than ground soil in spring, you can plant earlier and extend your growing season on both ends. It’s gardening without the usual barriers.
What You’ll Need to Get Started
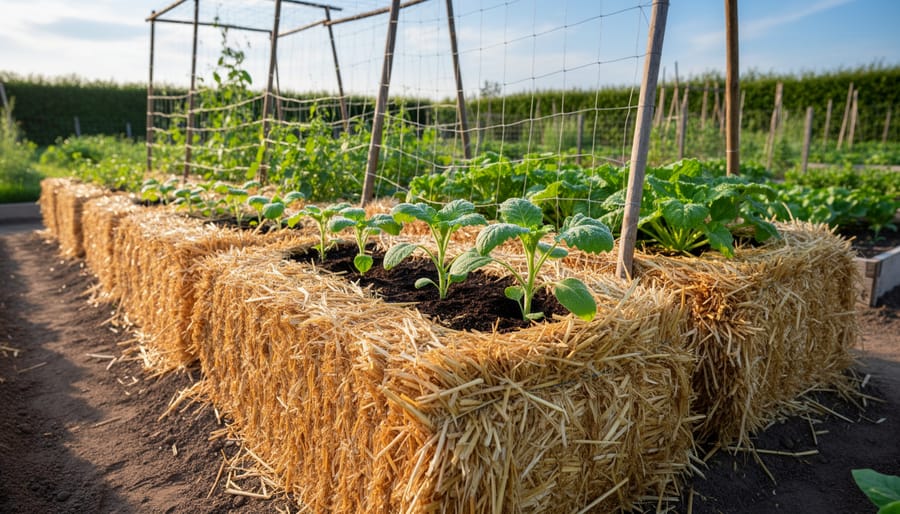
Choosing the Right Straw Bales
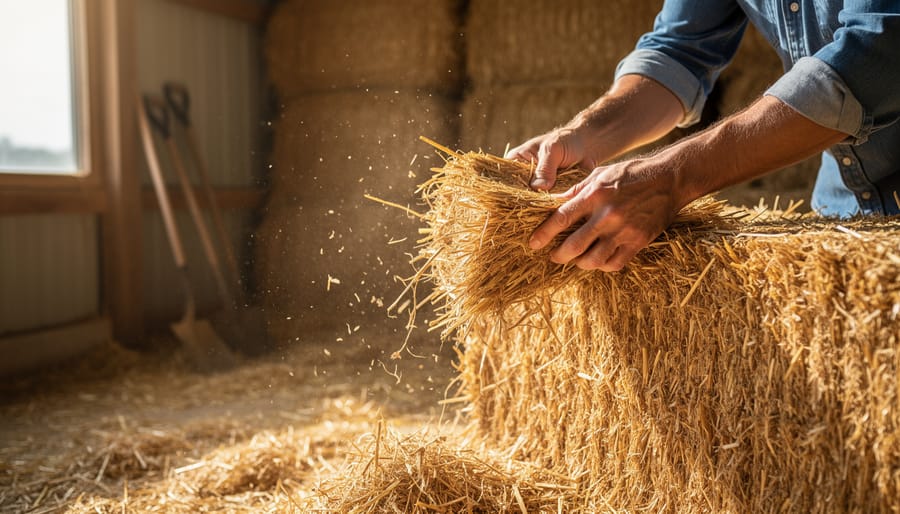
The single most important decision for your straw bale garden is buying the right bales. You need clean wheat or barley straw, and it must be herbicide-free and organically sourced. This isn’t negotiable. Herbicide residue can persist in straw for months or even years, stunting or killing your plants before they get started. If you’re unsure about a bale’s history, ask the supplier directly or run a simple bioassay test by planting bean seeds in a sample and watching for normal growth.
Here’s what trips up beginners: confusing straw with hay. Hay is animal feed cut before seed heads mature, packed with seeds that will sprout into a weed nightmare in your garden. Straw is the hollow stem left after grain harvest. Clean straw contains very few weed seeds, so your bales won’t turn into a sprouting mess. If you accidentally buy hay or spot any sprouts poking through your bales, wipe them with vinegar or pull them out immediately.
When you’re shopping, look for tight, golden bales that smell fresh, not musty. Wheat and barley straw work equally well. Local farm supply stores, feed stores, and farmers are your best sources. Buy in early spring for best selection, and don’t be shy about asking for organic certification or herbicide-free guarantees in writing.
Support Structures and Irrigation Supplies
You’ll need a few key structural pieces to keep your straw bale garden upright and properly watered through the season. Not every crop requires the full framework, but gathering these supplies before you start will save you scrambling mid-planting.
For vertical support, grab 7-9 foot steel T-posts, two for each row of bales you plan to set up. You’ll pound these into the ground at both ends of the row, then string 14-gauge wire between them every 10 inches above the bales. This creates a sturdy trellis system that supports vining crops like cucumbers, pole beans, and indeterminate tomatoes as they climb. If you’re only growing low, bushy plants, lettuce, peppers, compact squash varieties, you can skip the posts and wire entirely.
Irrigation is non-negotiable. Straw bales dry out fast in summer heat, so you’ll want soaker hoses stretched down the center of each row. Pin them in place with long wire staples to prevent shifting when you water. Soaker hoses deliver moisture directly to the root zone without runoff, and they’re far easier than hand-watering every single day. Test your setup before planting to make sure water reaches the entire length of each bale evenly.
Important Safety and Site Considerations
Before you set your first bale in place, a few critical safety and site choices will save you headaches and protect your garden’s success. Choose a spot that gets at least six hours of full sun daily, ideally eight or more for fruiting crops like tomatoes and peppers. Avoid placing bales directly on wooden decking, patios, or any surface you want to preserve, wet straw bales are heavy (over 100 pounds when saturated) and will eventually decompose, staining or rotting the surface beneath them. A level, stable area with bare soil or gravel works best, both for drainage and to let posts anchor securely.
If you live in a very dry climate, be mindful that straw is flammable until thoroughly wet, keep bales away from grills, fire pits, or other ignition sources during the initial setup. Once conditioning begins and bales stay moist, fire risk drops significantly. Finally, consider accessibility: position your rows where you can comfortably reach the center of each bale without straining, and leave enough space between rows for a wheelbarrow or garden cart if you’ll be hauling compost or tools. These upfront decisions set the foundation for a smooth, productive growing season.
Step-by-Step: Setting Up Your Straw Bale Garden
Step 1: Position Your Bales
Lay your bales in a single row with the cut ends facing up and down, never the sides. The strings or twine binding each bale should run vertically along the left and right edges, not across the top surface where you’ll be planting. This orientation matters because you’ll be creating planting pockets in the flat top surface, and the string placement affects how well the bale holds together as it decomposes through the season.
Set the bales end to end in your chosen sunny location, touching or nearly touching each other to create a continuous row. If you’re building multiple rows, leave at least two feet of walking space between them for maintenance access. Press down on each bale to check stability, they should sit firmly on level ground without rocking. Wet soil is fine, but avoid placing bales directly on wooden decking or surfaces that can’t handle moisture, since the bales will become heavy and damp once conditioning and watering begin.
Step 2: Install Support Posts and Wire Trellis
Once your bales are positioned with the strings on the sides, it’s time to build the support framework for taller crops. This step is essential if you’re growing vining plants like tomatoes, cucumbers, pole beans, or squash, but you can skip it entirely for low-growing crops such as lettuce, herbs, or bush varieties.
Start by pounding a 7 to 9 foot steel T-post into the ground at each end of your bale row. Drive them deep enough for stability, at least 18 to 24 inches into the soil. The posts need to withstand wind and the weight of fully grown, fruit-laden plants throughout the season.
Next, pull 14-gauge wire taut from post to post, spacing each horizontal line about 10 inches apart above the bales. Begin your first wire roughly 6 inches above the top of the bales and work upward. This creates a sturdy trellis grid that plants can climb or be tied to as they grow. Use wire tight enough that it doesn’t sag, but leave a bit of give so it won’t snap under weight.
If you’re growing only compact crops like peppers, strawberries, or radishes, you can save yourself the effort and expense. These plants don’t need vertical support and will thrive just fine on the bale surface alone.
Step 3: Set Up Irrigation
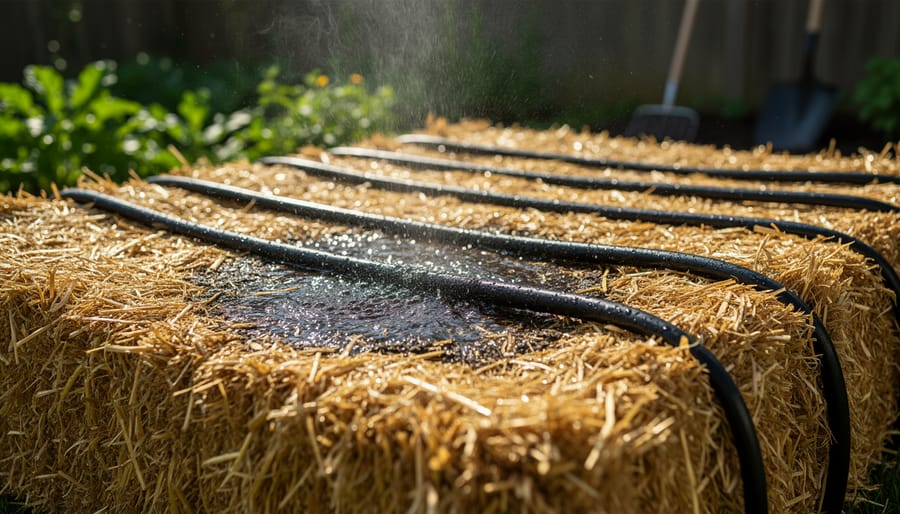
Stretch your soaker hose down the center of each row of bales and secure it with long wire staples every few feet. Soaker hoses work best for straw bale gardens because they deliver water directly into the bales without runoff, and the slow, steady seep keeps the straw evenly moist without washing away nutrients. Overhead watering wastes water and can encourage fungal issues on plant leaves.
Before you plant, run the system for 15 minutes and check that water is seeping out along the entire length of the hose. Squeeze the bales in several spots to confirm moisture is penetrating all the way through, not just dampening the surface. If you find dry patches, adjust the hose position or add a second line for wider rows. Getting this right now saves you from spotty growth later.
Step 4: Condition the Bales
Conditioning transforms raw straw bales into fertile growing containers, and skipping this step will leave you with plants struggling in dry, uncomposted material. The process jump-starts decomposition by adding nitrogen and water, creating the warm, nutrient-rich environment your vegetables need to thrive.
Start conditioning 10-14 days before you plan to plant. On days 1, 3, and 5, sprinkle half a cup of high-nitrogen fertilizer (like blood meal for organic gardens or ammonium nitrate for conventional setups) across the top of each bale, then water thoroughly until runoff appears at the base. On days 2, 4, and 6, water without adding fertilizer. For days 7 through 10, switch to a balanced fertilizer (like 10-10-10) at the same rate, watering daily.
You’ll know it’s working when you feel heat radiating from inside the bale. That internal warmth, sometimes reaching 120°F, signals active decomposition. By day 10 or 12, check the temperature by pushing your hand into the center. When the bale feels just warm to the touch rather than hot, conditioning is complete. The straw will look slightly darker and feel softer than when you started.
If you’re planting cool-season crops in fall, you can cut conditioning to 7-10 days since decomposition happens more slowly in cooler weather. Just ensure the bales have cooled enough that they won’t cook transplant roots.
Step 5: Plant Your Garden
Once your bales are conditioned and cooling down, it’s planting time. Use your hand or a trowel to create planting pockets in the top of each bale, pushing the loose straw aside to form depressions about 4-6 inches deep. For transplants like tomatoes, peppers, or squash seedlings, set each plant into its pocket and backfill with a handful of compost or potting mix to give roots something to grab initially. If you’re direct-seeding lettuce or other greens, fill the pockets with an inch or two of potting soil first, then sow seeds at the depth recommended on the packet.
Space transplants as you would in a raised bed guide: one tomato or pepper per bale, two to three squash plants, or multiple lettuce seedlings scattered across the surface. The same planting basics apply here. Water thoroughly after planting to settle roots into the straw and activate that final burst of microbial activity.
Ongoing Maintenance and Weed Control
Once your plants are in the ground, straw bale gardening shifts into a straightforward rhythm of watering, feeding, and watching your crops thrive. The beauty of this method is that most of the hard work happens upfront during setup and conditioning.
Water is your most critical daily task. Straw bales drain quickly and don’t hold moisture the way soil does, so you’ll need to check them every day during the growing season. In hot weather, especially if you’re growing thirsty crops like tomatoes or cucumbers, plan to water at least once daily and possibly twice on scorching days. The soaker hose you installed along the center of each row makes this easy. Turn it on for 20-30 minutes in the morning, allowing water to seep deep into the bales. Stick your finger a few inches into the straw after watering to confirm moisture has penetrated, not just dampened the surface.
Fertilizing follows a weekly schedule after planting. Since straw contains very little nutrition on its own, your plants depend on supplemental feeding throughout the season. Use a balanced liquid fertilizer diluted according to package directions, applied during your regular watering sessions. Organic options like fish emulsion or compost tea work beautifully and support the ongoing decomposition process inside the bales.
Here’s your maintenance checklist to keep handy:
- Water daily, checking bale moisture with your finger
- Apply liquid fertilizer once per week
- Pull or vinegar-wipe any sprouts immediately
- Harvest produce promptly when ripe to encourage continued production
Weed management is refreshingly simple with clean straw bales. Unlike traditional garden beds, properly sourced wheat or barley straw contains very few weed seeds, so your bales won’t sprout the usual suspects that plague in-ground gardens. If any rogue sprouts do appear poking through the straw, deal with them immediately. Pull them out by hand or wipe the shoots with plain white vinegar to kill them without introducing herbicides to your growing area.
Spring plantings require more attention to watering as the weather warms and plants establish roots. Summer crops planted directly into already-warm bales grow faster but demand consistent moisture from day one. Adjust your watering schedule to match both the season and your plants’ stage of growth, watching for wilting as your signal to water more frequently.
How to Know Your Bale Garden Is Thriving
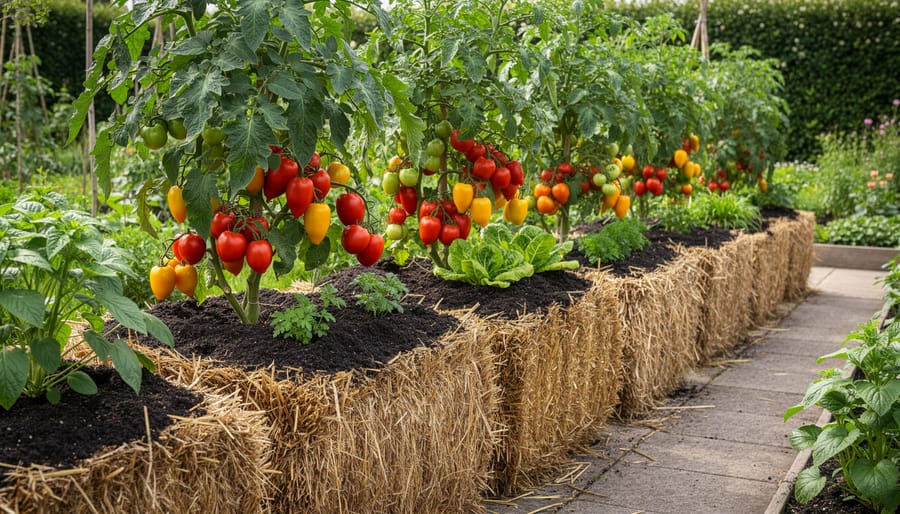
A healthy straw bale garden shows clear signs from the start. Your plants should grow vigorously, with bright green foliage and steady upward progress within the first few weeks after planting. Stick your hand into the center of a bale occasionally, it should feel warm but not hot (around body temperature or slightly cooler as decomposition stabilizes), indicating the conditioning process has done its work and the bale is actively breaking down into a nutrient-rich growing medium.
Moisture is everything. The top of each bale should stay consistently damp, never bone-dry or waterlogged. If you notice the surface turning crispy or pale, increase your watering frequency. Conversely, if bales feel soggy and plants look pale or stunted, dial back the irrigation and check that your soaker hose is distributing water evenly rather than pooling in one spot.
Clean straw contains very few weed seeds, so you should see minimal sprouting from the bales themselves. If any unexpected green shoots do appear, wipe them with vinegar or pull them out immediately before they establish roots. Yellowing leaves usually signal a nitrogen deficiency, add a light dose of fertilizer and water it in well.
As weeks pass, expect the bales to settle and compress. They’ll darken, shrink slightly, and become softer as the straw decomposes. This is normal and beneficial. By mid-season, the bales transform into a spongy, soil-like mass that holds moisture beautifully and supports vigorous root growth. That gradual breakdown is the whole point, you’re watching your growing medium come alive.
What Happens After the Growing Season
When your growing season wraps up, those decomposed bales become a valuable resource rather than waste. By fall, your bales will have broken down considerably, they’ll be compressed, darker, and crumbly. This rich material makes excellent mulch for perennial beds or can be added to your compost bin to boost organic matter for next year’s garden.
Can you reuse the bales for a second season? Technically yes, but expect diminished results. The structure will be largely degraded, making them less effective as growing containers. Most gardeners find it’s better to use second-year bales as a base layer for paths or to spread them as soil amendment in traditional garden beds.
Planning ahead matters. If you’re ordering bales for spring planting, secure them in late winter to ensure you get clean, herbicide-free wheat or barley straw. The conditioning process takes two weeks before planting, so timing your bale acquisition with your local frost dates keeps you on track. This cycle of growth, decomposition, and soil enrichment embodies the sustainable spirit of gardening, nothing goes to waste, and each season builds fertility for the next.
Common Questions About Straw Bale Gardening
My inbox fills up every spring with the same handful of questions from readers ready to try straw bale gardening for the first time. These concerns are completely understandable when you’re investing time and money into a new growing method, so let me address the most common ones I hear.
How long do straw bales last?
A properly conditioned bale will support vigorous plant growth for one full growing season. By season’s end, the bale will have decomposed significantly and can be repurposed as mulch or compost, but it won’t provide enough structure for a second year of intensive planting.
Can I grow root vegetables in straw bales?
Smaller root crops like radishes and carrots can work if you create deep planting pockets and keep the bales well-conditioned. However, the loose, decomposing structure isn’t ideal for larger root vegetables like potatoes or beets, which prefer denser, more stable soil.
What if I can’t find organic, herbicide-free straw?
Contact local farms directly during harvest season and ask specifically about their herbicide use. If you’re uncertain about a bale’s history, run a simple bioassay test: plant fast-growing seeds like beans in a sample of the straw and watch for normal germination and growth over two weeks.
Do straw bales attract pests or rodents?
Clean wheat or barley straw doesn’t typically attract pests because it contains very little seed or grain. Rodents occasionally nest in bales during winter storage, but once you start the conditioning process and regular watering begins, they move on quickly.
When should I start conditioning my bales?
Begin conditioning 10-14 days before your area’s last expected frost date, which you can determine using the USDA zones map. This timing ensures your bales are ready for transplants right when the planting window opens in your region.
One question that doesn’t get asked enough: what about weeds? Here’s the good news. Clean straw has very few weed seeds in it, so your bales won’t sprout the carpet of weeds you’d battle in a traditional garden bed. If any sprouts do appear, wipe them with vinegar or pull them out immediately before they establish roots. This is one of the biggest practical advantages of straw bale gardening, and it saves hours of weeding time through the season.
Straw bale gardening offers a refreshingly simple entry point into growing your own food, no matter your experience level or yard situation. You don’t need perfect soil, extensive tools, or even the ability to bend and dig for hours. A few bales, some posts and wire, and a watering system get you started. The method practically eliminates weeding, and you’ll be amazed how quickly plants take root in conditioned straw.
If you’re reading this in late 2026, you’ve got two great windows ahead: start conditioning bales now for early spring 2027 planting, or set up a quick fall garden with cool-season crops like lettuce and greens. Either way, you’re one growing season away from harvesting vegetables you grew in a completely new way. The setup takes an afternoon. The rewards last all season. Give it a try.