How to Start No Till Gardening: A Step-by-Step Method for Healthier Soil
No till gardening transforms compacted, lifeless soil into a thriving ecosystem without ever turning a spade. You build fertility by layering organic materials directly on the ground, starting with cardboard or newspaper as a weed barrier, then piling on compost, leaves, straw, and other amendments. The method preserves the intricate network of beneficial fungi, earthworms, and microorganisms that conventional tilling destroys with every pass.
I stumbled into this approach by accident three years ago when a shoulder injury left me unable to turn my vegetable beds that fall. Desperate to keep gardening, I smothered the weeds under cardboard, dumped every bag of leaves my neighbors set out on the curb, and crossed my fingers. By the following spring, I pulled back the decomposed layers to find the richest, darkest soil I’d ever grown. The earthworms had done all the work I couldn’t.
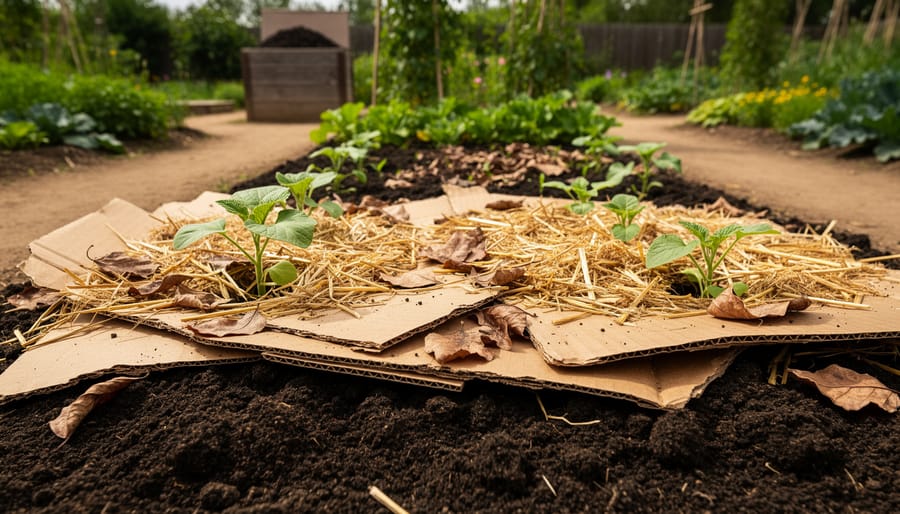
The beauty of sheet mulching, the most common no till technique, lies in its timing. Start your layers in fall and the materials break down over winter, giving you planting-ready beds by spring without a single hour spent double-digging. You’re working with nature’s own decomposition cycle rather than fighting it. The cardboard smothers existing vegetation while the layers above feed the soil life below, creating structure and nutrients simultaneously.
This guide walks you through every material you’ll need, the precise layering sequence that prevents common pitfalls, and how to verify your bed is truly ready for planting.
Understanding the No-Till Approach
When you walk through an undisturbed forest, you don’t see anyone out there with a rototiller preparing the ground for spring growth. Yet somehow, the soil beneath those trees is rich, alive, and productive. No-till gardening takes its cues from this natural model, working with the soil’s built-in systems rather than breaking them apart season after season.
The fundamental principle is simple: leave the soil structure intact. Traditional tilling turns everything upside down, disrupting the complex networks of fungi, bacteria, and beneficial organisms that make soil truly fertile. It also breaks apart soil aggregates, those tiny clumps that create air pockets and water channels. When you till, you get a fluffy bed that looks perfect for a few weeks, but you’ve just destroyed years of underground architecture. The organisms that were quietly processing nutrients and building soil health scatter or die off. Rain and foot traffic quickly compact that loose soil again, often leaving it harder than before.
No-till gardening flips this script entirely. By building layers on top of the soil rather than mixing them in, you protect the life below while feeding it from above. Worms move freely up and down, pulling organic matter deeper. Fungal threads stretch unbroken through the soil, connecting plant roots in vast communication networks. The structure stays porous and well-drained because it’s held together by living roots and microbial glues, not your tillage schedule.
This approach integrates naturally into thoughtful garden design creating beds that improve year after year instead of starting from scratch each spring.
What You’ll Need to Get Started
Starting a no-till garden bed doesn’t require specialized equipment or expensive supplies. Most of what you need might already be sitting in your recycling bin or piled in a corner of your yard. I discovered this when I first tried sheet mulching with materials I’d been meaning to haul away, turns out they were exactly what my soil needed.
The foundation of any no-till bed is cardboard. Plain corrugated boxes work perfectly, and you’ll find plenty at grocery stores, appliance shops, or your own Amazon deliveries. Avoid anything glossy, waxed, or treated with chemicals. Remove tape and staples, but don’t worry about small bits of paper labels, they’ll break down just fine.
For the organic layers that go on top of your cardboard, gather whatever you have on hand:
- Fresh garden clippings from weeding or pruning
- Old potting soil from containers you’re retiring for the season
- Fallen leaves raked from your yard
- Grass clippings if you mow without herbicides
- Kitchen scraps if you choose a compost bin
- Shredded newspaper or paper bags as additional brown material
You’ll also want a garden hose or watering can to thoroughly moisten your layers, and basic tools like a shovel if you’re removing any shrubby plants first. A wheelbarrow makes hauling materials easier, but buckets work too.
The beauty of this method is its flexibility. Don’t have leaves? Use more grass clippings. No old potting soil? Extra garden debris does the job. The goal is building layers that will feed your soil as they decompose, so work with what’s available in your landscape right now.
Important Considerations Before You Begin
Before you start your no-till garden, timing is everything. Fall is the ideal season to begin sheet mulching because autumn rains and winter snow provide months of moisture that help the cardboard break down naturally. By spring, your bed will be ready for planting without any heavy lifting on your part.
Site selection matters too. Choose a spot that gets adequate sunlight for your intended plants and has reasonable drainage. You don’t need perfect soil to start, that’s the beauty of this method, but avoid areas with aggressive perennial weeds like bindweed or quack grass, which can push through the cardboard layer.
Never use diseased plant material in your organic layers. Composting diseased leaves or stems can spread problems to your new bed, undermining all your careful work. Stick to healthy garden clippings, clean leaves, and old potting soil from containers.
Set realistic expectations about the timeline. The decomposition process takes months, not weeks. If you start in fall, you’re looking at a spring planting date, roughly six to eight months later. This isn’t a weekend project that produces immediate results, but rather an investment in building living soil that will reward you for years to come. Patience here pays dividends in garden health and productivity.
Step-by-Step: Building Your No-Till Garden Bed
Step 1: Clearing and Preparing the Site
Start by walking through your space to know your plot and identify what’s already growing there. Look for woody shrubs, persistent perennials, or anything with established root systems that might push through your no-till layers. These need to come out first, but here’s the key: you’re removing the plants themselves, not excavating the soil.
Pull or cut shrubby growth at ground level rather than digging out the roots. For stubborn woody plants, use loppers or a small saw to cut them flush with the soil surface. The roots left behind will decompose naturally and actually feed your developing soil ecosystem. Clear away any large debris, rocks, or thick plant matter that would create air pockets under your cardboard layer.
If you’re dealing with lawn grass or soft weeds, leave them in place. They’ll smother under the cardboard and become part of your organic matter. The goal is a relatively smooth surface where cardboard can make good contact with the ground, not pristine bare soil.
Step 2: Laying the Cardboard Foundation
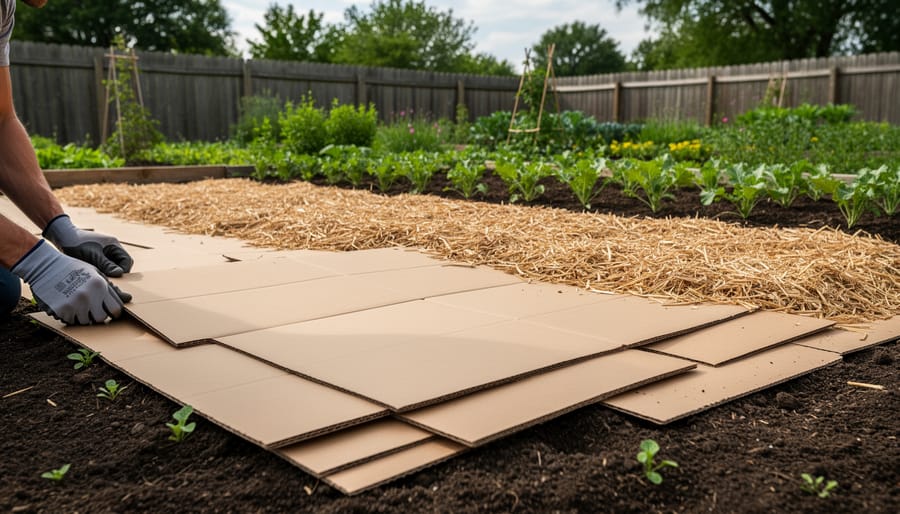
Once you’ve cleared the site, it’s time to lay your cardboard foundation, the heart of the no-till method. Use whole sheets of cardboard and overlap them by at least six inches on all sides to prevent weeds from sneaking through the gaps. I learned this the hard way my first season when a few inadequate overlaps left me with persistent thistle patches come spring.
Cover every inch of your garden bed, right up to the edges. If you’re working around existing plants you want to keep, cut the cardboard to fit snugly around their base. Plain cardboard works best, avoid anything with glossy coatings or heavy printing. The goal is complete coverage that blocks light while still allowing water to penetrate down to the soil below, setting the stage for the organic layers you’ll add next.
Step 3: Adding Organic Layers
Once your cardboard foundation is in place, it’s time to build the layers that will feed your soil as they break down. I start with whatever green garden clippings I have on hand, spent flower stems, pulled weeds (seedheads removed), or fresh grass clippings work beautifully. Spread these about two to three inches thick across the cardboard.
Next comes old potting soil from containers, which I scatter over the green layer. Don’t worry if it looks patchy; you’re not aiming for perfection. This spent soil still contains organic matter and beneficial microbes that jumpstart decomposition. If you don’t have old potting soil, compost or aged manure work just as well.
Top everything with a generous blanket of fallen leaves, I aim for four to six inches once settled. Leaves are the secret ingredient here; they hold moisture, insulate the layers below, and slowly break down to feed the cardboard underneath. Mix oak, maple, or whatever you’ve got. I’ve learned to resist the urge to make it neat; a loose, irregular pile actually traps more moisture and creates better habitat for the decomposers doing the real work. Water the whole thing thoroughly until it’s damp like a wrung-out sponge. This moisture is what allows the magic to happen over the coming months.
Step 4: Watering and Waiting
Once you’ve layered your materials, give everything a thorough soaking with a hose or sprinkler. The cardboard needs to be completely saturated, think wet newspaper, not damp, to begin breaking down effectively. This is why starting in fall is such a gift to your no till gardening timeline: nature does most of the watering work for you through autumn rains, winter snow, and spring melt.
I check my beds once or twice during mild winter spells, adding water if we’ve had a dry stretch, but honestly, the weather usually handles it. By late winter, you’ll notice the cardboard softening and the layers settling. Come early spring, peek under the top layer, if the cardboard tears easily in your hands and earthworms have moved in, you’re on track. The goal is patient transformation, not speed. Let those fall, winter, and spring months do their quiet work while you plan what you’ll plant.
Step 5: Ready to Plant
By spring, you’ll notice exciting changes in your no till bed. The cardboard will have broken down significantly, and the organic layers will have compressed and started to integrate with the soil below. When you can easily push your finger through where the cardboard was, and the materials have settled into a dark, crumbly layer, your bed is ready for planting.
Before you start, familiarize yourself with planting basics if you’re new to gardening. When preparing to plant, gently pull back the remaining organic matter to create planting pockets rather than disturbing the entire bed. For seeds, you can create shallow trenches through the decomposed layers. For transplants, dig holes just large enough for the root balls, keeping soil disturbance to a minimum. This approach maintains the no-till principle while giving your plants the best start in their new home.
Choosing Plants for Your New No-Till Bed
Your newly established no-till bed is ready for planting, but selecting the right plants at this stage sets you up for long-term success. Pioneer species that establish quickly and tolerate the still-maturing soil conditions work best in the first season, allowing roots to penetrate and continue improving soil structure without needing the intensive nutrient levels of a fully-developed bed.
For Canadian zones, these native perennials thrive in new no-till systems:
- Black Eyed Susan establishes rapidly with deep taproots that break up compacted layers naturally
- Blue Vervain tolerates variable moisture while its root system creates channels for water and air movement
- New England Aster develops extensive fibrous roots that stabilize soil and feed beneficial organisms
- Evening Primrose spreads quickly to cover bare spots and suppress weeds during the establishment phase
These plants share characteristics that make them ideal for newly mulched beds: resilient root systems, tolerance for less-than-perfect conditions, and the ability to continue building soil as they grow. They don’t demand the rich fertility of a mature garden, yet they contribute organic matter through root exudates and eventually their own decomposing foliage.
If you’re working with a smaller space similar to square foot gardening layouts, consider starting with just two or three of these pioneer species rather than filling every available inch immediately. This gives you room to observe how the bed responds and add more plants as the soil matures through the season. The goal isn’t instant abundance but establishing a foundation that improves year after year, with each plant contributing to the living soil you’re building beneath the surface.
How to Know Your Garden Is Ready
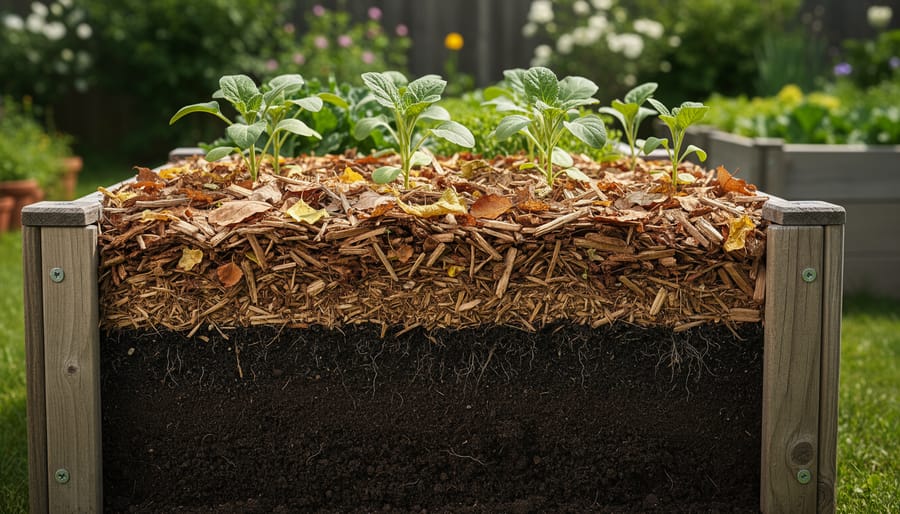
By spring, your no-till bed should show clear signs it’s ready for planting. The cardboard you laid down in fall will have softened and mostly decomposed, breaking apart when you tug at it gently. You’ll notice the layers of garden clippings and leaves have settled and darkened, creating a rich, crumbly texture rather than distinct piles of material.
To test readiness, use a trowel to dig down a few inches. The soil beneath should feel loose and alive, not compacted. If earthworms appear as you dig, that’s an excellent sign that the biology is active and thriving. The cardboard doesn’t need to vanish completely, but it should be weak enough that plant roots can push through without resistance.
If your bed still feels too firm or the cardboard remains thick and intact, give it more time. This happens when the weather stays cold longer or if the materials didn’t get enough moisture through winter. Add another layer of compost or aged leaves, water it well, and check again in two to three weeks.
Once you’re confident the bed is ready, avoid the temptation to till or turn it over. That’s the whole point of this approach. Simply pull back the top layer where you want to plant, nestle your seedlings or seeds into place, and tuck the organic matter back around them. The living soil you’ve built will take care of the rest, season after season.
Common Questions About No-Till Gardening
Can I start no-till gardening any time of year? What if my cardboard isn’t breaking down? If you’re thinking about jumping into this soil-building method, you’ve probably hit a few questions that make you pause. Let me walk you through the concerns I hear most often from gardeners trying this approach for the first time.
When is the best time to start a no-till garden bed?
Fall is ideal because it gives the cardboard and organic layers all winter to decompose, so your bed is ready for spring planting. You can start in spring or summer, but you’ll need to wait longer before planting.
What if my cardboard hasn’t decomposed after several months?
Add more moisture and check that you used plain cardboard without plastic coating. In dry climates, you may need to water the bed periodically to keep decomposition active.
Can I plant immediately after laying down the cardboard layers?
Not in most cases. The cardboard needs time to break down so roots can penetrate. The exception is if you create planting pockets by cutting through the cardboard and filling them with finished compost.
How do I maintain a no-till bed after the first year?
Keep adding organic matter to the surface each season. Mulch with leaves, compost, or grass clippings, and let earthworms and microbes do the mixing for you instead of using a shovel.
Another common worry is whether you need special soil underneath to make this work. You don’t. The whole point of sheet mulching is to build good soil on top of whatever you’re starting with, even compacted clay or weedy ground. That’s why the cardboard acts as a weed barrier while the organic layers above it create the rich planting medium.
Some gardeners wonder if they can adapt this technique to raised beds or containers. Absolutely. Skip the cardboard in a raised bed since you’re working with contained soil, and just focus on adding organic matter to the top each season without disturbing what’s below. The same principle applies: feed the soil surface and let nature handle the rest.
If you’re dealing with aggressive perennial weeds like bindweed or quackgrass, you might need two layers of cardboard with good overlap to fully smother them. Keep an eye on the edges of your bed during that first season, and add more cardboard if you spot any determined shoots trying to break through.
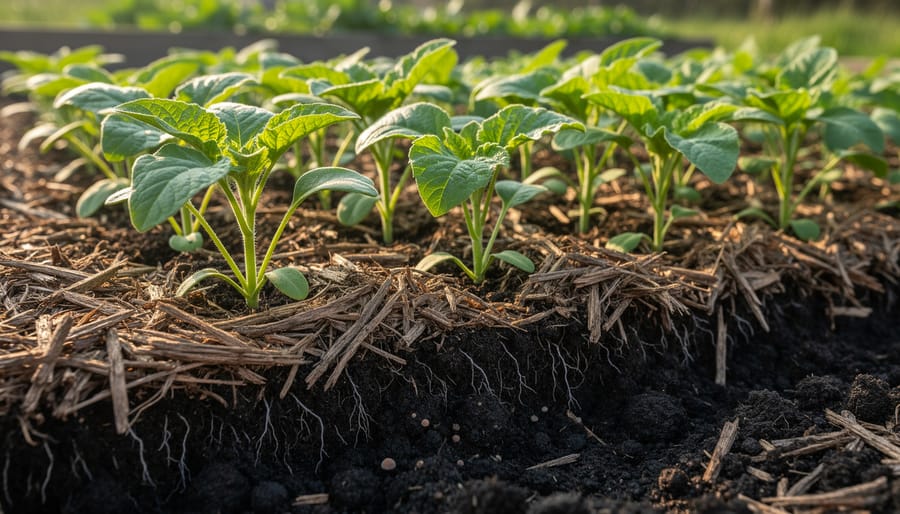
Starting a no-till garden is one of the most rewarding decisions you can make for your soil and your plants. By choosing to work with nature instead of against it, you’re creating a living ecosystem that gets richer and more vibrant with each passing season. The cardboard you lay this fall, the layers of organic matter you add, the millions of microorganisms you protect, they all become part of a thriving underground community that feeds your plants better than any bag of fertilizer ever could.
I still remember the skepticism I felt the first time I covered my garden with cardboard and walked away for months. But when spring arrived and I pushed my fingers into that dark, crumbly soil teeming with earthworms, I was hooked. There’s something deeply satisfying about building soil rather than depleting it, about knowing that each year your garden becomes more alive, more resilient, more generous.
Your no-till garden won’t just grow plants, it will grow your connection to the land beneath your feet. Start this fall, trust the process, and let the soil do what it does best.