How to Garden in Raised Beds: A Complete Step-by-Step Guide
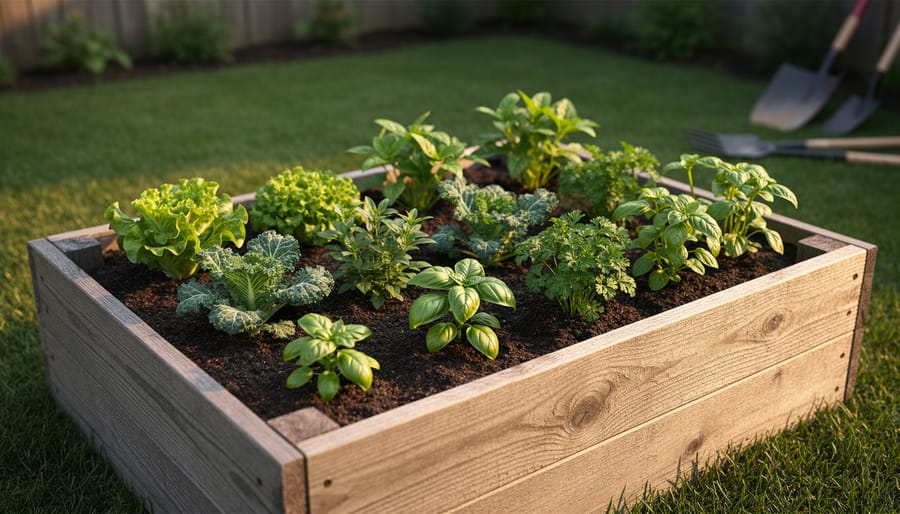
Gardening in raised beds means building a contained planting area above ground level, filling it with quality soil, and growing vegetables, herbs, or flowers in a controlled environment that drains better and warms faster than traditional in-ground plots. Most gardeners can build a basic 4×8-foot bed in an afternoon using untreated lumber, galvanized screws, and landscape fabric, then fill it with a custom soil blend tailored to their crops.
The method works because you’re creating ideal growing conditions from scratch rather than amending whatever native soil happens to exist in your yard. You control drainage, depth, and nutrient levels while keeping your back happier with less bending. I started with raised beds after years of fighting clay soil that turned to concrete each summer, and the difference in harvest volume that first season convinced me I’d wasted too much time digging in-ground rows.
Raised beds particularly shine for gardeners dealing with poor native soil, those wanting earlier spring planting when ground soil stays cold and wet, or anyone with mobility concerns who’d rather not kneel on hard ground. The contained space also makes crop rotation simpler and pest management more targeted.
This guide walks through the complete process: selecting materials and dimensions, building a sturdy frame, filling it with the right soil layers, and planting your first crops. You’ll learn which woods last longest, how deep different vegetables actually need, and how to maintain fertility season after season. Whether you’re converting a sunny patch of lawn this weekend or planning a full kitchen garden for next spring, the steps remain consistent and forgiving enough for first-timers.
Why Raised Beds Work So Well
Raised beds transform typical gardening challenges into manageable advantages. Instead of fighting compacted clay or wrestling with poor drainage, you control exactly what goes into your growing space. The contained structure means you fill it with quality soil mix from day one, skipping years of ground amendment.
Drainage improves dramatically because raised beds sit above grade. Water moves through the loose soil and exits at the base rather than pooling around roots. That elevation also warms the soil faster in spring, often two to three weeks earlier than ground level, extending your growing season at both ends. You can plant cool-season crops when neighbors are still waiting for frozen ground to thaw.
Back and knee strain drops significantly when your garden sits 12 to 24 inches higher. You bend less, kneel less, and can even sit on the edge while working. For anyone with mobility concerns, that difference matters daily throughout the season.
Pest management becomes simpler too. Slugs and some ground-dwelling insects face a tougher climb. You can add hardware cloth at the base to exclude burrowing rodents, something nearly impossible in open ground. Weeds still appear, but they’re easier to spot and pull from the fluffy soil.
The beds create defined growing zones you can rotate crops through, rest sections, or amend individually based on what you’re planting. That precision makes you a better gardener over time because you see exactly what works, and what needs adjusting, without variables muddying the results.
Tools and Materials You’ll Need
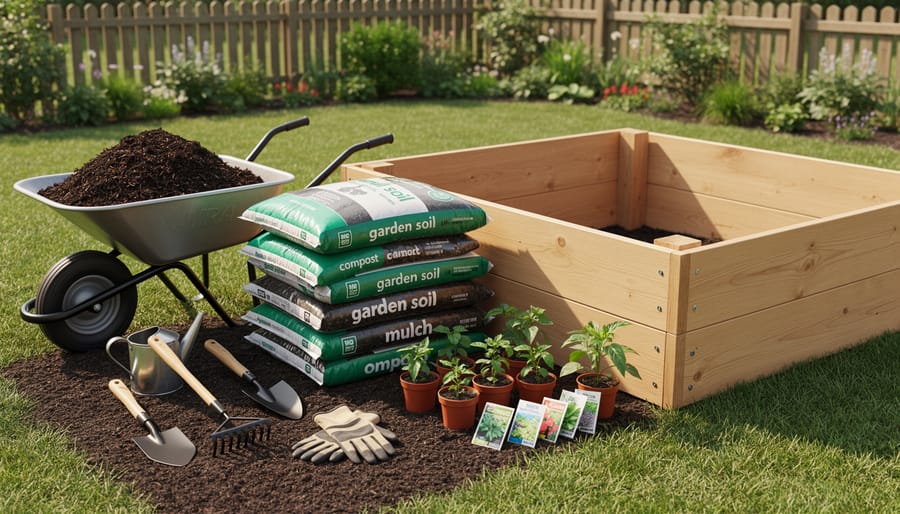
Before you start building, gather everything you’ll need so you’re not making multiple trips to the shed or hardware store. I like to organize materials by task, it keeps the project moving smoothly and helps you spot what you might already have on hand.
For Construction:
- Lumber boards (untreated cedar, redwood, or composite; avoid pressure-treated wood with toxic chemicals)
- Corner brackets or galvanized screws (3-inch deck screws work well)
- Drill with driver bits
- Measuring tape and carpenter’s square
- Level (even a smartphone level app works)
- Saw if you’re cutting lumber to size
For Filling Your Bed:
- Quality topsoil or garden soil (roughly 60% of your fill)
- Compost or aged manure (about 40% of your mix)
- Optional drainage layer: coarse gravel or small branches for the bottom
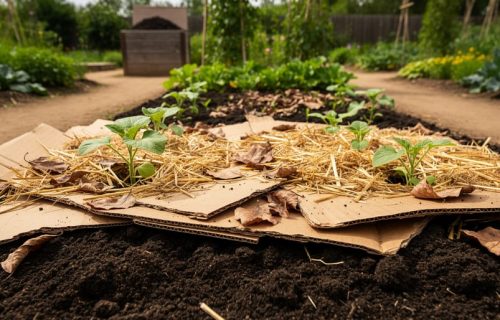
- Landscape fabric or flattened cardboard boxes to suppress weeds
- Garden hose with spray nozzle for initial watering
- Wheelbarrow for moving soil and materials
- Shovel and garden rake
Budget-Friendly Alternatives:
You don’t need to buy everything new. Check your garage first, many gardeners already own a drill, measuring tape, and basic hand tools. Reclaimed lumber from old fences or pallets can work beautifully for bed frames, though inspect carefully for rot and avoid anything painted or chemically treated. Cardboard boxes from recent deliveries replace landscape fabric perfectly and break down over time, adding organic matter. If you’ve got a compost pile going, you’re already ahead on filling materials.
For soil, consider splitting bulk deliveries with neighbors to reduce costs, or start with one smaller bed and expand as you accumulate materials. Some gardeners successfully use a mix of existing yard soil amended heavily with compost rather than purchasing all new topsoil, though you’ll want reasonably weed-free, quality soil to start with.
Safety Considerations Before You Start
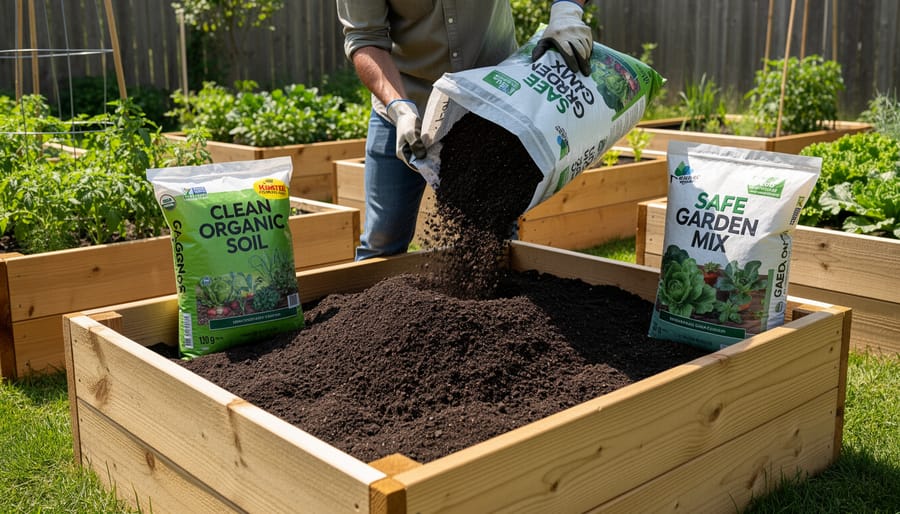
Before you get too excited and start building, a few safety considerations will save you from costly mistakes and potential health hazards. First and foremost, steer clear of old pressure-treated lumber that may contain chromated copper arsenate (CCA), a wood preservative banned for residential use in 2003 but still present in older materials. If you’re repurposing wood or buying used lumber, look for newer treated options labeled for ground contact or untreated cedar and redwood instead.
Soil sourcing matters too. Avoid bringing in dirt from unknown locations like construction sites or industrial areas, where lead risks from soil contamination can lurk unseen. Stick with bagged compost and topsoil from reputable garden centers, or test your existing yard soil if you’re mixing it into the bed.
When moving materials, bend at the knees rather than your back, those bags of soil add up quickly. If you’re cutting lumber or assembling frames, wear safety glasses and keep power tools dry. Check out gardening tool ideas that include proper safety gear alongside your shovels and trowels.
Finally, expect your newly filled bed to settle several inches after the first few waterings. This is completely normal, not a construction failure, and you’ll likely need to top it off with more soil before planting.
Step-by-Step: Building and Filling Your Raised Bed
Step 1: Choose Your Location and Size
Pick a spot that gets at least six hours of direct sunlight daily, most vegetables and herbs need full sun to produce well. South-facing locations typically receive the most consistent light throughout the growing season. Place your bed close enough to a water source that dragging a hose won’t feel like a chore every time you need to irrigate, because you’ll be watering more frequently than in-ground gardens, especially during hot stretches.
Consider convenience alongside sun exposure. You’ll visit this bed almost daily during peak season, so position it where you can easily reach it from your house or usual garden path. Avoid low spots where water pools after rain, and steer clear of areas directly beneath large trees, both the shade and competing root systems will hamper growth.
For sizing, a width of three to four feet allows you to reach the center from either side without stepping into the bed and compacting the soil. Length is flexible based on your space, though many gardeners start with a six to eight-foot bed. Keep depth between ten and twelve inches for most vegetables; deeper beds work well for root crops like carrots but require more soil to fill. If mobility is a concern, build beds at a comfortable working height, eighteen to thirty inches tall, so you can tend plants while seated or without excessive bending.
Step 2: Build or Assemble Your Raised Bed Frame
Building your raised bed frame is simpler than you might think, even if you’ve never worked with wood before. A basic rectangular bed uses just four boards joined at the corners, and the whole process can take less than an hour.
Start with your pre-cut lumber (typically two 8-foot boards and two 4-foot boards for a standard 4×8 bed). Here’s how to put it together:
- Lay out your boards on level ground in a rectangle to visualize the final shape and check that corners meet squarely.
- Join the corners using either galvanized deck screws (three per corner, pre-drilled to prevent splitting) or corner brackets for faster assembly.
- Check that the frame is square by measuring diagonally from corner to corner, both measurements should match exactly.
- Level the frame by adjusting the ground beneath it or shimming with flat stones, ensuring water drains evenly across the bed.
- Anchor the bed in place by driving wooden stakes or rebar through pre-drilled holes at each corner, pushing them at least six inches into the ground.
For taller beds, stack a second layer of boards on top of the first, offsetting the seams like bricks for added strength. Secure the layers together with long screws driven through both boards.
If construction feels overwhelming, ready-made kits offer an excellent alternative. These typically arrive with pre-cut, pre-drilled pieces and all necessary hardware, you simply snap or bolt the components together following the included instructions. Kits work particularly well for gardeners with limited tools or those wanting a quicker setup. Many feature modular designs that let you expand your garden layout later.
The key at this stage is making sure your frame sits level and feels solid when you press on the corners. Once it’s stable and anchored, you’re ready to start filling.
Step 3: Prepare the Base Layer
The ground beneath your raised bed matters more than most beginners realize. Start by deciding whether to remove existing grass and weeds. You can skip this step if you’re using cardboard or multiple layers of newspaper as your base, they’ll smother vegetation over time while breaking down to feed the soil. If you prefer removing turf, skim off the top two inches or use a flat spade to cut and lift sections away.
Next, lay down your weed barrier if you’re using one. Cardboard works beautifully because it’s free, biodegradable, and blocks weeds while earthworms can eventually work through it. Overlap pieces by several inches to prevent gaps. Landscape fabric is another option, though it won’t break down and can complicate future soil amendments. Some gardeners skip barriers entirely, especially in areas without aggressive weeds or when placing beds over gravel or concrete.
For drainage, you don’t need anything fancy. If your bed sits on compacted soil or clay, rough up the surface with a garden fork to help water move through. Adding a thin layer of coarse material like small sticks or leaves at the very bottom can improve drainage in problem spots, but it’s optional for most locations. The key is ensuring water won’t pool under your soil mix.
Step 4: Fill with the Right Materials
Filling your raised bed properly sets the stage for healthy plants all season long. You’ll need a mix of materials that drain well, hold moisture, and provide nutrients, getting this balance right makes everything easier down the line.
Start with the optional bottom layer. If you’re building on compacted ground or want to stretch your soil budget, add 4-6 inches of coarse material like leaves, straw, small twigs, or even cardboard. This layer improves drainage and breaks down over time to feed the soil above. Skip it if you’re on well-draining ground or filling a shallow bed.
For the main soil mix, aim for roughly equal parts compost and quality topsoil or garden soil. Compost feeds your plants and improves texture, while topsoil gives structure and bulk. You can adjust the ratio, more compost for hungry crops like tomatoes, a bit less for herbs that prefer leaner conditions. If your budget’s tight, use your own finished compost, ask neighbors for theirs, or check municipal programs that offer it free or cheap. Some gardeners mix in a bit of coconut coir or peat moss to help with moisture retention, though it’s not essential.
Avoid pure compost or potting mix, they’re too fluffy and can dry out fast or stay soggy. The topsoil component anchors everything.
Timing matters for filling. Early spring works well if you’re planting soon, but fall filling lets everything settle and meld over winter. Either way, water thoroughly after filling to help materials integrate and reveal any low spots you’ll want to top off before planting.
Step 5: Water and Let It Settle
Once your bed is filled, give it a thorough soaking with a gentle spray or hose. Water slowly until moisture reaches the bottom layer, you’ll see it begin to pool on the surface before soaking in. This initial watering compacts air pockets and starts the settling process.
Let the bed sit for at least 48 hours, ideally a week if you’re building ahead of planting season. The soil level will drop as organic matter compresses and particles shift into place. Expect the surface to sink noticeably, sometimes by several inches depending on how loosely you filled the bed and the composition of your mix.
Check the settled level before planting. If the soil sits more than two inches below the frame’s top edge, add more of your original soil mix to bring it back up. This top-up layer ensures you have adequate rooting depth and makes the most of your growing space. Water again lightly after topping off, then you’re ready to plant.
Verifying Your Bed Is Ready for Planting
Before you plant, give your raised bed a final inspection. You built the frame and filled it with soil, but a few quick checks prevent problems later. This verification step takes maybe fifteen minutes and saves you from replanting or fixing issues mid-season.
First, test the soil moisture and texture. Squeeze a handful of your bed’s soil, it should clump loosely then crumble when you poke it, not form a wet ball or fall apart like dust. If it’s too wet, wait a few days; if it’s bone dry, water thoroughly and let it absorb overnight. This simple squeeze test confirms your soil has the right balance to support root growth without drowning seedlings.
Next, check drainage by pouring a bucket of water into the center of the bed. It should soak in within a few minutes, not pool on the surface or vanish instantly. Poor drainage drowns roots; too-fast drainage means you’ll be watering constantly. If water pools, you may need to mix in more compost or coarse materials to improve the structure.
Walk around your bed and inspect the frame corners and joints. Push gently against each side, nothing should wobble or shift. If you choose the right location initially, your bed should sit level on solid ground, but settling can loosen things. Tighten any screws or add corner braces if needed before planting.
Confirm your bed’s working height. Stand beside it in your normal gardening stance. Can you reach the center without overextending? If you need to kneel to work comfortably, that’s fine, just make sure the height won’t cause back strain during weeding or harvesting.
Here’s your ready-to-plant checklist:
- Soil clumps loosely when squeezed, not soggy or dusty
- Water soaks in within minutes without pooling
- Frame corners are stable with no wobbling
- Bed sits level and accessible from all sides
- Soil level is within two inches of the top rim after settling
If your soil level dropped more than expected after watering, top it off with fresh mix. Knowing how to compost helps you make your own amendment for this purpose. Once these checks pass, you’re ready to plant with confidence that your bed will support healthy growth all season.
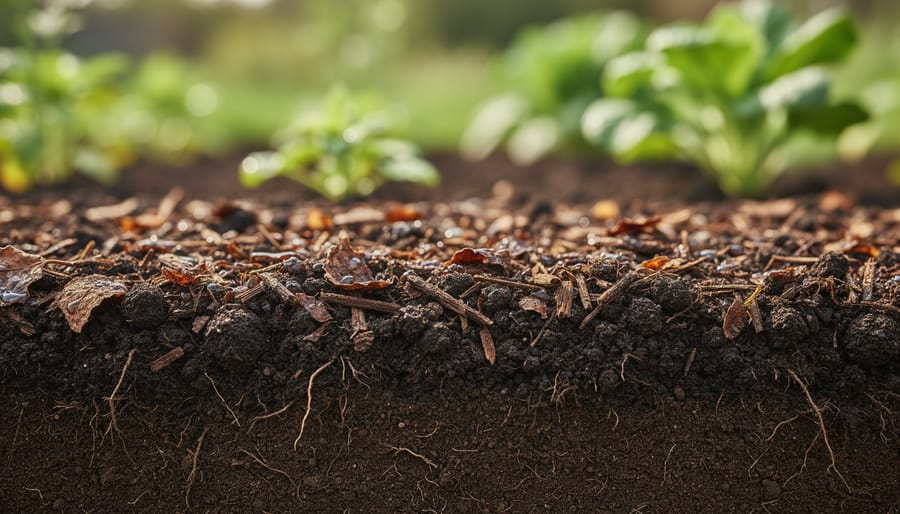
Getting Started with Your First Planting
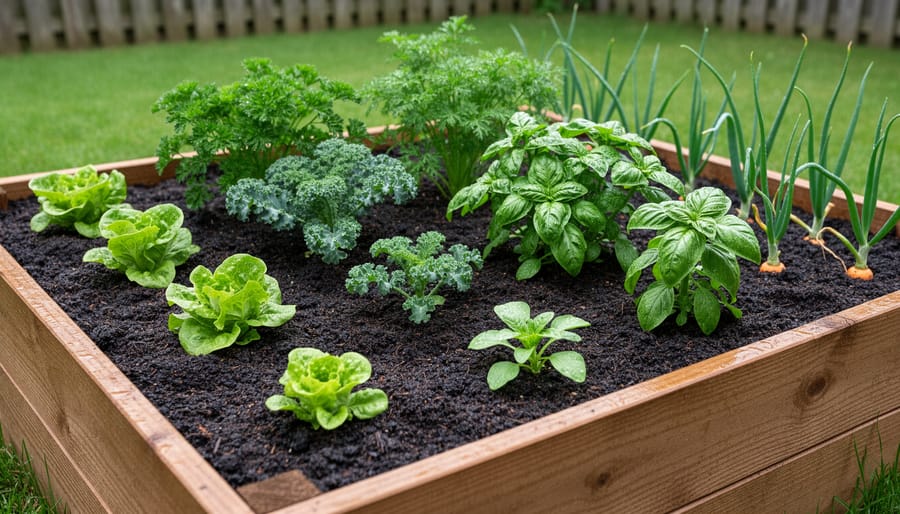
With your bed built, filled, and settled, you’re ready to start growing. The beauty of raised beds is the control you have over spacing, you can plant more densely than in traditional rows since you won’t be walking on the soil and compacting it.
Start by mapping out your layout on paper. Most vegetables need 12 to 18 inches of space, but you can tuck quick-growing crops like lettuce or radishes between larger plants. In a 4×8 bed, you might fit three tomato plants down the center with basil and marigolds along the edges, or create a grid of 16 squares for variety.
Season matters tremendously. In spring, focus on cool-weather crops, peas, spinach, lettuce, broccoli, that tolerate frost. Wait until soil temperatures reach at least 60°F for warm-season plants like tomatoes, peppers, and squash. A simple soil thermometer takes the guesswork out.
Water your new plantings immediately and check soil moisture daily for the first two weeks. Raised beds drain faster than ground gardens, especially in warm weather, so consistent watering helps young roots establish. Mulch around plants once they’re a few inches tall to retain moisture and suppress weeds.
If you’re in the Clear Hills County area, the Clear Hills County Gardening Workshop on March 9th from 1:00-3:00 PM in Eureka offers hands-on guidance for getting started. Learning alongside other gardeners can fast-track your confidence, particularly with timing and variety selection for your specific climate.
Start small, observe what works, and expand from there.
Common Questions About Raised Beds Gardening
How deep should my raised bed be?
Most vegetables thrive in beds 10-12 inches deep, which accommodates the root systems of crops like tomatoes, peppers, and leafy greens. If you’re growing shallow-rooted herbs or lettuce, 6-8 inches works fine, while root vegetables like carrots and parsnips prefer 12-18 inches for optimal development.
Do I need to replace all the soil every year?
No, you don’t need to start from scratch annually. Simply top off your beds with 1-2 inches of fresh compost each season to replenish nutrients and maintain soil volume as organic matter breaks down naturally.
How do I keep weeds out of my raised beds?
Weeds are less common in raised beds than ground gardens because you control the soil mix from the start. Adding a thick layer of mulch and keeping beds densely planted leaves little room for weed seeds to establish, though you’ll still need to pull the occasional intruder that blows in.
Should I do anything special to prepare beds for winter?
After your final harvest, remove spent plants and add a layer of compost or aged manure to protect and enrich the soil over winter. You can also plant a cover crop like winter rye if you’re in a milder climate, or simply mulch heavily and let the bed rest until spring.
Will I need to water raised beds more often than ground gardens?
Yes, raised beds drain faster and their elevated position exposes more soil surface to sun and wind, so they dry out more quickly than ground-level plots. Plan to check soil moisture every day or two during hot weather, and consider drip irrigation or soaker hoses to keep watering manageable.
Can I use a square foot layout in my raised bed?
Absolutely, raised beds pair perfectly with a square foot layout since the defined frame makes it easy to divide space into grid sections. This approach maximizes your growing area and simplifies planting basics by giving you clear spacing guidelines for each crop type.
These questions come up repeatedly among gardeners making the transition to raised beds, and addressing them upfront saves frustration down the line. The beauty of this growing method is that most challenges have straightforward solutions once you understand the fundamentals. If you’re still feeling uncertain about getting started, hands-on learning can make a real difference, the Clear Hills County Gardening Workshop on March 9th from 1:00-3:00 PM at the Eureka location offers practical guidance for new gardeners exploring raised bed methods.
You’ve now got everything you need to start your raised beds gardening journey. The beauty of this method is that it scales perfectly to your comfort level, one 4×8 bed is genuinely enough to grow a season’s worth of salad greens, herbs, and a few tomatoes. You don’t need to commit to a whole garden plot transformation on day one.
If you’re reading this in late winter or early spring, you’re in the ideal window to build and fill your beds so they’re settled and ready for planting after the last frost. Summer readers can still get beds built for fall crops like lettuce and kale, while autumn is perfect for construction work that lets the soil settle and mellow over winter.
Start with what feels manageable. Build one bed, plant it, learn what works in your specific spot, then expand when you’re ready. The skills you’ve gained here, from corner joints to soil layering to drainage testing, transfer directly to every bed you add. Your first raised bed is simply the beginning of a more accessible, productive, and enjoyable way to grow food and flowers at home.