
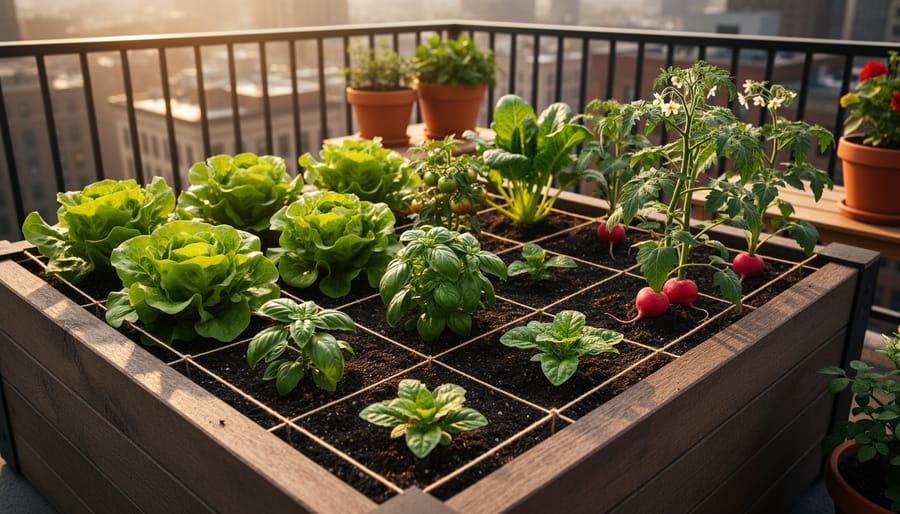
Why Square Foot Gardening Transforms Tiny Spaces into Productive Food Factories
Imagine growing enough fresh vegetables to fill your dinner table every night using just a 4×4 foot space in your backyard. That’s the promise of square foot gardening, and after watching my neighbor transform her tiny patio into a thriving salad bar last spring, I became a complete convert to this brilliantly simple method.
Square foot gardening turns traditional row gardening on its head by dividing raised beds into one-foot squares, with each square hosting a different crop based on plant size. Instead of sprawling gardens that demand hours of weeding and watering, you’ll maintain compact, highly productive beds that even apartment dwellers can manage on a balcony. The genius lies in its structure: you’ll never waste space, overplant, or struggle to reach your tomatoes buried behind overgrown zucchini plants.
Mel Bartholomew introduced this revolutionary approach in 1981, and it’s transformed how millions of people grow food. Whether you’re a complete beginner intimidated by traditional gardening or an experienced gardener tired of battling weeds in endless rows, this method levels the playing field. You’ll use 80% less space than conventional gardens while producing the same yields, spend a fraction of the time on maintenance, and completely eliminate the backbreaking work of tilling large plots.
The beauty of square foot gardening is its accessibility. No expensive equipment, no perfect soil conditions, no sprawling yard required. Just raised beds, quality soil mix, and a simple grid system that makes planning your garden as easy as playing tic-tac-toe.
What Makes Square Foot Gardening Different From Traditional Row Gardening
The Magic Behind the Grid System
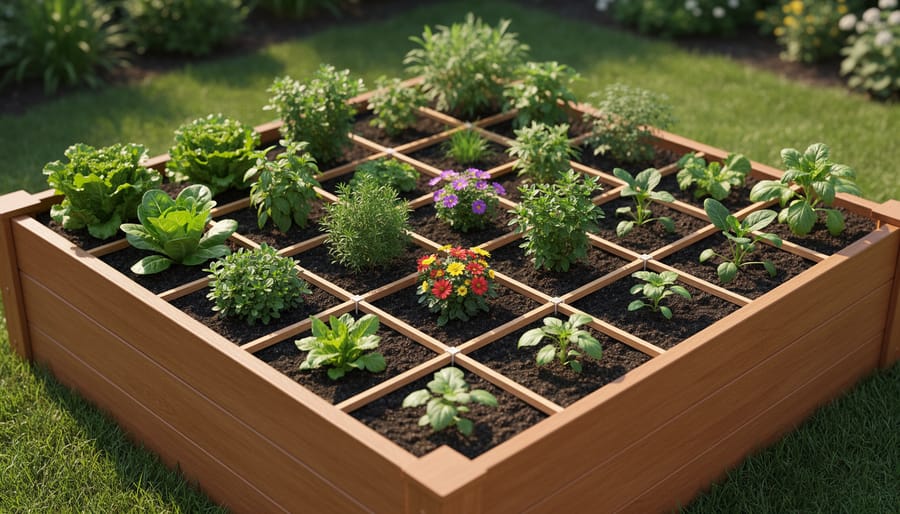
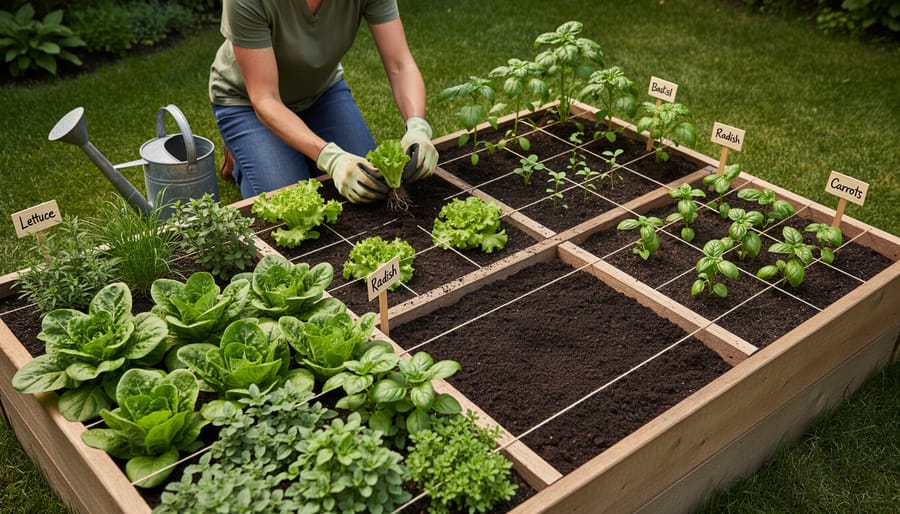
Picture this: you’re standing over your garden bed with a yardstick, and suddenly everything clicks. The foundation of square foot gardening is brilliantly simple—divide your raised bed into individual one-foot squares using string, wooden slats, or even paint. I remember the first time I laid out my grid, thinking it looked almost too neat to be a real garden, but that precision is exactly what makes this method so powerful.
Each square becomes its own mini-garden plot, perfectly sized for growing a specific number of plants based on their mature size. Large plants like tomatoes or peppers get one square all to themselves, medium plants like lettuce might get four per square, and tiny crops like radishes can squeeze in sixteen per square. It’s like solving a delicious, edible puzzle.
But why one foot? This isn’t arbitrary. A foot is comfortable reaching distance from any side of a four-foot-wide bed, meaning you never need to step on your soil or strain yourself tending plants. It’s also the perfect balance between maximizing space and giving most vegetables enough root room to thrive. The grid eliminates the guesswork of traditional row spacing and prevents that common beginner mistake of planting too close together or wasting space with gaps.
The visual grid also makes succession planting incredibly easy. When spring lettuce finishes in one square, you can immediately see exactly where to plant your summer beans. It transforms garden planning from overwhelming to manageable, one square at a time.
Space Efficiency That Actually Makes Sense
Here’s something that honestly surprised me when I first tried square foot gardening: my 4×4 foot raised bed produced more lettuce, radishes, and herbs than my neighbor’s traditional 10×25 foot row garden. How is that possible?
Traditional row gardening was designed for tractors and tillers to move between plants, which means you’re dedicating enormous amounts of space to pathways you’ll never harvest from. In a typical row garden, you might plant lettuce in rows 18 inches apart, with seeds scattered every few inches within the row. The actual plants might take up only 30% of your garden space, while walkways claim the rest.
Square foot gardening flips this on its head. Instead of rows, you divide your bed into one-foot squares and plant intensively within each square based on plant size. A single square foot can hold sixteen radishes, nine spinach plants, four lettuce heads, or one tomato plant. There’s no wasted pathway space within the bed itself.
Let me give you a real-world comparison from my own garden last spring. My 4×4 square foot bed gave me 16 squares of usable planting space. A traditional row garden producing the same variety and quantity would need roughly 100 square feet because of all those pathways. That’s six times more space for the same harvest.
For apartment dwellers or anyone with a small yard, this efficiency is transformative. You’re not choosing between tomatoes or peppers anymore. You can genuinely grow a diverse, productive garden in the space where a traditional garden would barely get started.
Building Your Square Foot Garden From Scratch
Choosing the Perfect Location
Finding the right spot for your square foot garden can make all the difference between a thriving harvest and a lackluster one. I learned this the hard way when I placed my first garden box in what I thought was a sunny spot, only to realize a nearby tree cast afternoon shadows that stunted my tomatoes!
Your ideal location needs at least six to eight hours of direct sunlight daily. Morning sun is particularly valuable for vegetables, as it helps dry overnight dew and reduces disease pressure. If you’re planning a spring garden, remember that trees without leaves in early season will cast shade once summer arrives, so scout your location during the same season you’ll be gardening.
Drainage is equally crucial. Avoid low-lying areas where water pools after rain, as soggy soil leads to root rot. Test your spot by observing it after a heavy downpour. Water should drain within a few hours, not create a puddle that lingers.
Accessibility matters more than you might think. Position your boxes within easy reach of a water source and close enough to your house that you’ll actually visit them daily. Trust me, the closer they are to your kitchen door, the more likely you’ll harvest fresh herbs for dinner!
Materials That Won’t Break the Bank
Here’s the truth I wish someone had told me when I started: you don’t need to spend a fortune to create a thriving square foot garden. While those gorgeous pre-made kits tempt us with their perfect corners and cedar construction, you can achieve the same results with wallet-friendly alternatives.
For your raised bed frame, untreated lumber from your local hardware store works beautifully. I built my first 4×4 bed with basic pine boards for under thirty dollars. Cedar and redwood last longer outdoors, but if you’re budget-conscious, regular lumber treated with a non-toxic sealant does just fine for several seasons. Even better, check local buy-and-sell groups or construction sites for reclaimed wood—just ensure it’s untreated and safe for growing food.
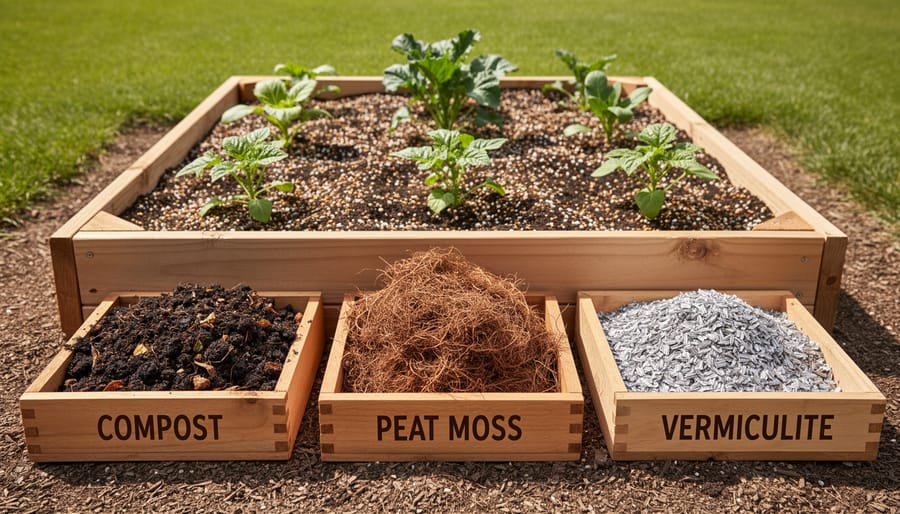
The famous Mel’s Mix soil blend calls for equal parts compost, peat moss (or coconut coir), and vermiculite. Instead of buying pre-mixed versions, purchase components separately and mix them yourself. I saved nearly fifty percent doing this last spring. Local bulk suppliers often sell compost and vermiculite at fraction of retail prices.
For the grid divider—arguably the method’s signature feature—skip specialty products and use anything straight and sturdy. Bamboo stakes, wooden slats, or even weatherproof string work perfectly. My neighbor uses painted popsicle sticks glued to twine, and it looks charming while costing practically nothing.
The DIY route typically costs sixty to eighty dollars for a complete 4×4 bed, while pre-made kits range from one hundred fifty to three hundred dollars. Choose based on your time availability and carpentry comfort level.
The Simple Construction Process
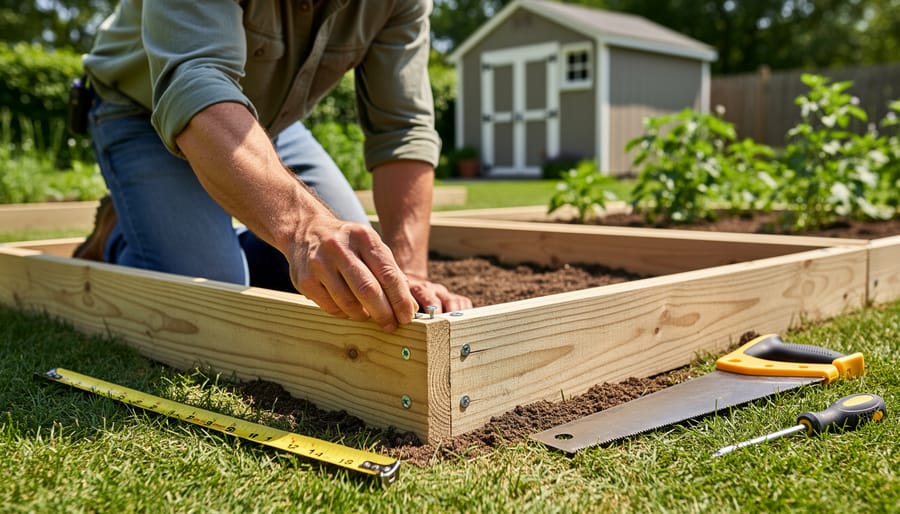
Building your first square foot garden is surprisingly straightforward, and I still remember the satisfaction of completing mine on a Saturday morning with just basic tools and minimal experience. Let me walk you through this process step by step.
Start by constructing a simple raised bed frame, typically 4 feet by 4 feet and 6 to 12 inches deep. You can use untreated cedar, composite lumber, or even cinder blocks. For beginners, I recommend starting with a single 4×4 bed before expanding. Simply cut four boards to length and secure the corners with deck screws or corner brackets. The beauty of raised bed gardening is that you don’t need carpentry expertise—if the corners meet reasonably well, you’re golden.
Position your frame on level ground in your chosen sunny spot. You don’t need to remove the grass underneath; it will decompose naturally. Fill the frame with Mel’s Mix or your preferred growing medium, leveling it about an inch below the rim.
Now for the signature grid system: this is what transforms ordinary raised beds into square foot gardens. The easiest method uses wooden slats, bamboo stakes, or even twine. Create a grid dividing your bed into one-foot squares. For a 4×4 bed, you’ll need two slats running each direction, creating sixteen squares total. Simply lay them across the top of your frame and secure with small nails or staples.
Troubleshooting tip: if your grid shifts when planting, try notching the slats where they intersect or using small corner brackets. Some gardeners prefer painting their slats white for better visibility, which also helps during those early morning planting sessions when the light isn’t perfect. The grid doesn’t need to be permanent—seasonal adjustments are completely acceptable.
Mel’s Mix: The Soil Recipe That Changed Everything
The Three Essential Ingredients
The magic of square foot gardening really comes down to what you put in those boxes, and that magic formula has just three simple ingredients. I still remember the first time I mixed up my own batch—it felt like I was creating something truly special for my plants, and honestly, I was.
First up is compost, which serves as the nutritional powerhouse of your mix. This is where your plants get most of their food, packed with beneficial microorganisms and nutrients. You can make your own compost from kitchen scraps and yard waste, purchase it from local garden centers, or even get it from municipal composting programs. Look for compost that’s dark, crumbly, and smells earthy—not sour or ammonia-like.
Next comes peat moss, though I’ve switched to coco coir in recent years and couldn’t be happier. Both materials help retain moisture while keeping the mix light and fluffy. Peat moss has been the traditional choice, but coco coir is more sustainable and works just as beautifully. It comes in compressed bricks that expand when you add water—watching it triple in size never gets old. You’ll find both options at any garden center.
Finally, there’s vermiculite, those shiny little flakes that improve drainage and aeration. This mineral keeps your soil from compacting and helps distribute moisture evenly throughout the mix. Horticultural-grade vermiculite is what you want, available at garden supply stores or online.
Mix equal parts of each ingredient, and you’ve got yourself the perfect growing medium that drains well but holds enough moisture to keep your plants thriving all season long.
Mixing and Maintaining Your Growing Medium
Creating the perfect blend for square foot gardening is easier than you might think. The classic Mel’s Mix recipe calls for equal parts compost, peat moss (or coconut coir as an eco-friendly alternative), and vermiculite. I remember my first batch—I literally used buckets to measure one-third of each ingredient, mixing them thoroughly in a wheelbarrow like I was making the world’s best garden cake.
The key is mixing ingredients when they’re slightly damp, which prevents dust and helps everything combine evenly. Start with the vermiculite, add your compost, then finish with the peat moss or coir. Mix thoroughly with a shovel or your hands for smaller batches.
Between growing seasons, your soil needs refreshing. After harvesting each square, add a trowel or two of fresh compost and gently work it into the top few inches. This replenishes nutrients without the heavy work of replacing everything. Every few years, top off your beds with additional Mel’s Mix if settling occurs.
Here’s a spring tradition I’ve adopted: before planting season begins, I spread a thin layer of compost across all my squares and gently rake it in. This gives everything a nutritional boost and feels like tucking your garden in for success.
Plant Spacing Made Foolproof
The Spacing Rule Nobody Forgets
When I first encountered the square foot gardening spacing system, I’ll admit I was skeptical. How could one simple rule replace all those complicated seed packets with their varied spacing requirements? But here’s the beautiful secret: once you learn this, you’ll never fumble with a tape measure in your garden again.
The spacing rule breaks down into four simple categories based on plant size at maturity. Large plants like tomatoes, peppers, cabbage, and broccoli get one plant per square foot. Think of these as your garden’s solo performers—they need the whole stage. Medium-sized plants such as lettuce, Swiss chard, and bush beans fit four per square. Picture them in the four corners of your square, giving each plant about six inches of breathing room.
For smaller plants like radishes, carrots, beets, and spinach, you’ll plant nine per square in a tic-tac-toe pattern. This gives each plant roughly four inches of space. Finally, tiny plants like onion sets and certain herbs get sixteen per square, arranged in a neat four-by-four grid.
I remember standing in my garden the first spring after learning this system, holding a packet of carrot seeds and actually laughing at how simple it was. No more guessing, no more wasted space from planting too far apart, and no more overcrowding disasters from planting too close together.
The key is thinking about the mature plant’s width at harvest time. When in doubt, check the seed packet’s spacing recommendation and work backward. If it says space plants six inches apart, that’s four per square. Twelve inches apart? That’s one per square. This mental math becomes second nature faster than you’d imagine, transforming you from a confused beginner into a confident space-planning pro.
Common Plants and Their Square Assignments
One of the biggest revelations I had when I first started square foot gardening was realizing just how much I’d been overplanting in my traditional rows. Once you understand the spacing requirements, you’ll see how efficiently this method uses every inch of garden space. Let me walk you through the most popular plants and how many you can tuck into each square foot.
Leafy greens are wonderfully generous in the square foot garden. Lettuce varieties fit 4 plants per square, which gives them enough room to form nice heads without crowding. Spinach also takes 4 plants per square, though I always sneak in an extra seed or two for insurance, thinning later if needed. For arugula and mesclun mixes, you can go up to 9 plants per square since they’re often harvested young. Swiss chard, being larger, needs just 4 plants per square.
Root vegetables require a bit more planning based on their mature size. Carrots and radishes are space-efficient champions, fitting 16 per square. I love interplanting these two together since radishes mature quickly and mark the rows. Beets need more elbow room at 9 per square, while larger turnips take just 4. Onions fit nicely at 16 per square when growing from sets.
When it comes to larger vegetables, give tomatoes, peppers, and eggplants their own full square each. Cucumbers and summer squash also claim one square per plant, though I’ve found training cucumbers vertically saves tremendous space. Bush beans fit 9 per square, while pole beans need just 8 per square when grown on supports.
Herbs are particularly suited to square foot gardening. Basil, cilantro, and parsley each take 4 plants per square, providing abundant harvests throughout the season. Larger herbs like oregano, thyme, and sage need a full square each since they spread generously over time.
Succession Planting: How to Harvest All Season Long
Timing Your Plantings Like a Pro
The beauty of square foot gardening is how easily you can orchestrate a continuous harvest throughout the growing season. I learned this the hard way my first year—I planted everything at once and ended up with seventeen heads of lettuce ready in the same week!
Start your spring squares in early March with cool-season champions. Lettuce, spinach, and radishes can handle a light frost and will be ready to harvest before your tomatoes even go in the ground. As soon as you harvest that lettuce (usually within 30-40 days), replant that same square with something new. This is where a succession planting schedule becomes your best friend.
For summer, plan your warm-weather crops like tomatoes, peppers, and cucumbers to go in after your last frost date. Here’s a pro tip: plant basil in the squares surrounding your tomatoes in late May—they’ll be ready to harvest together for the most amazing caprese salads.
As summer winds down, those spent tomato squares become prime real estate for fall crops. Around mid-August, I replace my exhausted summer producers with kale, carrots, and broccoli. These cool-season lovers actually taste sweeter after a light frost.
Think of your garden calendar as a relay race—as one crop finishes, another takes its place. Keep notes on your planting dates and harvest times; you’ll quickly develop an intuitive sense of timing that maximizes every single square foot throughout the year.
Quick-Growing Crops That Keep Producing
One of the joys I’ve discovered with square foot gardening is how quickly you can go from seed to salad bowl. These fast-maturing crops are perfect for keeping your squares productive all season long through succession planting.
Radishes are the speed champions, ready to harvest in just 25-30 days. Plant a few squares every two weeks from spring through fall, and you’ll always have crisp additions for your table. Lettuce and other salad greens follow closely behind at 30-45 days, making them ideal for continuous harvesting. I like to plant a new square of mixed greens every three weeks.
Spinach matures in about 40-50 days and thrives in cooler weather, so plan spring and fall plantings. Bush beans produce their first harvest around 50-60 days and keep giving for weeks when you pick regularly. Each plant fits nicely into one square.
For summer abundance, try summer squash and zucchini, which start producing around 50-55 days and keep going strong with regular harvesting. Bush cucumbers are equally generous, ready in 55-60 days.
The real magic happens when you replant squares immediately after harvesting. That empty radish square? Perfect for a late-season planting of spinach. This rotation keeps your garden producing from spring until the first frost.
Companion Planting Within Your Squares
Perfect Plant Partnerships
One of my favorite square foot gardening discoveries came when I planted basil next to tomatoes in adjacent squares. Not only did they thrive together, but the concentrated arrangement made harvesting ingredients for pasta sauce incredibly convenient!
Understanding plant partnerships becomes especially important in square foot gardens where proximity is closer than traditional beds. Let me share some winning combinations that have transformed my compact garden spaces.
Tomatoes and basil make the classic pairing, but in a square foot garden, add a square of carrots underneath your tomato tower. The carrots appreciate the afternoon shade while loosening soil with their roots. I’ve found this trio produces abundantly without competing for nutrients.
Lettuce and radishes create a perfect spring partnership. Plant radishes around the outer edges of your lettuce square. The radishes mature quickly, marking your rows while the lettuce fills in. By the time your lettuce needs space, you’ve already harvested those peppery radishes for salads.
Beans and cucumbers work wonderfully when you’re maximizing vertical space. Position them in adjacent squares with a shared trellis between them. The beans actually enrich the soil with nitrogen, which cucumber plants happily consume. These companion planting strategies become even more valuable in confined spaces.
For a low-maintenance combination, try planting marigolds in corners where four squares meet. They deter pests while adding cheerful color, and they’ve saved my cabbage squares from aphid invasions more than once. Remember, successful partnerships consider growth habits, nutrient needs, and harvest timing together.
Maintaining Your Square Foot Garden (It’s Easier Than You Think)
Watering the Smart Way
One of my favorite surprises when I started square foot gardening was discovering how much less time I spent dragging hoses around. That special soil mix you created isn’t just about nutrients—it’s a moisture-retaining powerhouse that dramatically reduces your watering needs compared to traditional gardens.
The secret lies in the peat moss and vermiculite working together like a sponge. They absorb water during irrigation and release it slowly to plant roots over time, meaning you’ll typically water only once or twice a week instead of daily. I learned this the hard way during my first season when I overwatered out of habit, and my tomatoes protested with yellowing leaves.
When you do water, focus on delivering moisture directly to the soil surface rather than overhead watering, which wastes water through evaporation and can promote disease. A watering wand or drip irrigation system works beautifully for this. Water each square according to its specific plant’s needs—leafy greens appreciate consistent moisture, while established peppers prefer slightly drier conditions between waterings.
Check soil moisture by inserting your finger two inches deep. If it feels dry at that depth, it’s time to water. During hot summer weeks, you might need to water more frequently, but the raised bed design and quality soil mix still give you a significant advantage over conventional gardens.
Feeding Your Garden Without Overcomplicating
Here’s the beautiful thing about square foot gardening: Mel’s Mix is already nutrient-rich, so you’re starting ahead of the game! I learned this during my first season when I nervously over-fertilized, thinking my plants needed more help. They didn’t.
For most crops, a simple annual top-dressing of compost does wonders. Each spring, I add about an inch of finished compost to each square before planting. That’s it. The combination of compost, peat moss, and vermiculite in your original mix continues working its magic.
Heavy feeders like tomatoes and peppers appreciate a mid-season boost. I sprinkle a balanced organic fertilizer around the base when they start flowering, following package directions. Fish emulsion works beautifully too, diluted according to instructions and applied every two to three weeks.
For containers or if you notice yellowing leaves, a gentle liquid organic fertilizer keeps things moving. Spring and fall are prime feeding times, as summer heat can stress plants regardless of nutrients.
The key is observation over obsession. Your plants will tell you what they need through their growth and color. Trust the process, keep it simple, and remember that Mel’s Mix already provides most of what your garden requires.
Pest Control in Close Quarters
When you’re growing plants just inches apart, pests can spread quickly between neighbors. I learned this the hard way my first season when aphids jumped from lettuce to kale before I even noticed! The good news is that square foot gardening’s structure actually makes monitoring easier since everything’s within arm’s reach.
Check your garden daily, turning leaves and inspecting stems during your morning coffee routine. Early detection is your best defense. Companion planting works wonders in close quarters—I tuck marigolds and nasturtiums into corners to repel aphids and beetles naturally. Basil between tomato squares keeps hornworms guessing.
For immediate threats, hand-picking works surprisingly well in small spaces. A bucket of soapy water becomes your collection jar. Neem oil spray and insecticidal soap are gentle organic pest solutions that won’t harm beneficial insects when applied in early morning or evening.
Prevention beats treatment every time. Rotate plant families between squares each season to disrupt pest lifecycles. Keep foliage dry by watering at soil level, which prevents fungal diseases from taking hold. Remove any yellowing leaves promptly—they’re disease magnets. In fall, clean out plant debris completely and refresh your Mel’s Mix to start next spring pest-free.
Common Mistakes (And How I Learned From Mine)
Overcrowding Isn’t Always Obvious
Here’s the thing about overcrowding: it doesn’t always show up as wilting leaves or stunted growth right away. Sometimes your square looks beautifully full in May, but by July, you’ve got a tangled mess of competing plants that aren’t producing nearly what they should.
Watch for these telltale signs. If your lettuce leaves are smaller than usual or your carrots come up twisted and thin, you’ve probably planted too densely. When lower leaves start yellowing prematurely or you notice plants leaning away from each other reaching for light, that’s your garden telling you it needs breathing room.
I learned this the hard way one summer when I enthusiastically crammed 25 radishes into a square instead of the recommended 16. Sure, they all sprouted, but harvest time brought mostly marble-sized disappointments.
The fix? Thinning is your friend, even though it feels wasteful. When seedlings are about two inches tall, gently remove the weakest ones to achieve proper spacing. Those thinned greens often make delicious microgreens for salads. For future squares, resist the temptation to add “just one more” plant. Trust the spacing guidelines, they exist for good reason. Remember, a properly spaced square with healthy plants always outproduces an overcrowded one.
When to Break the Rules
While the square foot grid is wonderfully structured, some plants are rebels at heart and need a bit more breathing room. I learned this the hard way one spring when my zucchini plants literally invaded neighboring squares like determined explorers!
Generally, large sprawling vegetables like winter squash, pumpkins, and melons need multiple squares. Give them four squares arranged in a 2×2 pattern, or better yet, position them at the garden’s edge where their vines can ramble outside the bed. Similarly, indeterminate tomatoes and pole beans grow vertically and require sturdy trellises that might extend beyond their single square footprint.
Root vegetables like potatoes often perform better with more elbow room than one square provides. Consider dedicating an entire row or trying container growing for these space-hungry crops.
Herbs present another exception. While most fit the grid beautifully, perennial herbs like rosemary, oregano, and sage eventually outgrow their squares. Start them in the grid, but be prepared to transplant them to dedicated herb gardens once they mature.
The key is staying flexible. The square foot method provides an excellent framework, but your garden’s success depends on observing how your plants actually grow in your specific climate and adjusting accordingly. Think of the grid as guidance, not gospel.
You’ve made it this far, which means you’re ready to transform whatever space you have into a productive garden paradise. Whether you’ve got a sunny balcony, a modest backyard, or just a patch of earth that’s been calling your name, square foot gardening offers you the blueprint to make it flourish.
I still remember my first 4×4 grid, squeezed onto my apartment patio seven springs ago. I doubted whether sixteen little squares could really feed my family fresh vegetables all season long. But by midsummer, I was bringing in handfuls of cherry tomatoes, snipping fresh basil for dinner, and sharing surplus lettuce with neighbors. That small success sparked something bigger—not just more garden beds, but genuine confidence that I could grow food, even with zero farming background.
The beauty of this method is that it meets you exactly where you are. Start with just one box this season. Get your hands dirty. Learn what grows well in your microclimate. Make mistakes—they’re simply lessons in disguise. Each square becomes your teacher, showing you the rhythm of seeds sprouting, plants maturing, and harvests rolling in.
Your gardening journey doesn’t need to be perfect from day one. It just needs to begin. So mark off those squares, plant those seeds, and watch the magic unfold. I’d love to hear about your square foot gardening adventures—the victories, the surprises, and yes, even the occasional flops. After all, we’re all learning together, one square foot at a time.


Add A Comment