How to Design a Shade Garden in Zone 7 (Season-by-Season Blueprint)
Designing a shade garden in Zone 7 means working with one of the most versatile climate zones for shade-loving plants, where mild winters and warm, humid summers create ideal conditions for a lush, layered garden that thrives in low light. You’ll start by assessing your shade type (full, partial, or dappled), then select plants suited to both your light conditions and Zone 7’s temperature range (0°F to 10°F in winter), and finally arrange them in layers that create year-round interest. The process takes about a weekend to plan and another to plant, but the payoff is a garden that flourishes where sun-lovers struggle.
I spent years battling the deep shade along my north-facing fence in Virginia, cramming in sun-hungry perennials that limped along until I finally accepted what Zone 7 shade gardening taught me: work with the shadows, not against them. Once I switched to hostas, hellebores, and native ferns, that forgotten corner transformed into the most vibrant section of my yard.
The secret to Zone 7 shade garden success lies in understanding your microclimate. Summer humidity supports moisture-loving plants like astilbes and ligularias, while mild winters allow evergreen groundcovers to hold the garden’s structure when deciduous perennials go dormant. You’re not just filling empty space under trees. You’re creating a purposeful design that accounts for root competition, seasonal moisture patterns, and the specific light quality your site receives throughout the growing season.
This guide walks you through the complete process, from gathering your design tools to selecting proven Zone 7 performers that deliver color and texture from early spring through late fall.
Understanding Your Zone 7 Shade Garden Conditions
Understanding your specific growing conditions is like getting to know a new friend, you need to spend time observing before you can really understand what makes them tick. Zone 7 sits in that sweet spot where you’re not quite Southern but not fully Northern either, and that unique position creates both opportunities and challenges for shade gardening.
Zone 7 technically spans areas with average annual minimum temperatures between 0°F and 10°F, but that single number tells only part of the story. Your last spring frost typically arrives in mid-April, while the first fall frost doesn’t show up until late October or early November. That generous growing window is fantastic, but the real character of Zone 7 lies in what happens between those bookends. Summers can be brutally hot and humid, with temperatures regularly pushing into the 90s and humidity levels that make everything feel ten degrees warmer. Winters are usually mild, but you’ll see occasional cold snaps that can dip well below freezing, sometimes accompanied by ice storms that stress plants more than steady snow would.
Before you select a single plant, you need to understand what type of shade you’re actually working with. Dappled shade, created by high tree canopies or slatted structures, allows filtered sunlight to dance across the ground throughout the day, this is the easiest shade condition to work with and supports the widest variety of plants. Partial shade means your area receives direct sun for two to four hours daily, typically in the morning or late afternoon, with shade during the hottest part of the day. Full shade describes spots that receive less than two hours of direct sun, often found on the north side of buildings or under dense evergreen canopies where only the most shade-tolerant plants will thrive.
Your personal microclimate likely varies from the general Zone 7 description based on factors like elevation, proximity to water, urban heat island effects, and terrain. Spend a week or two observing your shady spot at different times of day. Note where puddles linger after rain, signaling poor drainage that many shade plants despise. Track how shade patterns shift from spring through fall as the sun’s angle changes and deciduous trees leaf out. A spot with bright dappled shade in April might become deep shade by June. Check your soil by digging down six inches, is it clay-heavy and compacted, or loose and organic-rich? These observations will save you from the heartbreak of planting shade lovers in spots that are actually too bright, or placing moisture-lovers where water never reaches their roots.
Tools and Materials You’ll Need
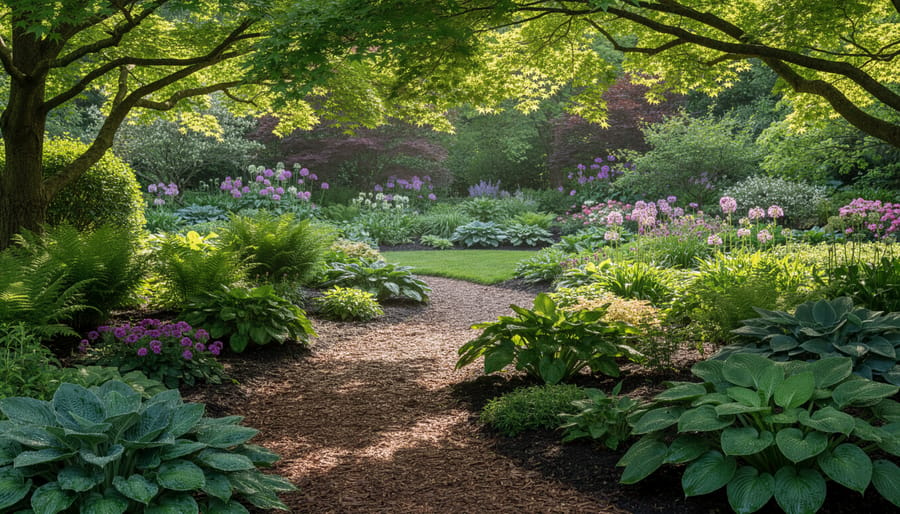
Before you plant a single hosta, gather your supplies, having the right tools from the start prevents mid-project runs to the garden center and saves you from working twice. I learned this the hard way when I tried to dig through compacted clay with a flimsy trowel while simultaneously balancing a plant list on my phone.
Planning and Assessment Tools
Start with a measuring tape (25-foot minimum) to map your space accurately, plus a garden hose or rope to outline bed shapes on the ground before you commit to digging. A soil test kit is non-negotiable, Zone 7’s variable soils range from sandy to heavy clay, and you need to know what you’re working with. For planning, either graph paper and colored pencils or a digital garden design app will help you visualize layouts and track sun patterns. A good plant reference guide specific to shade gardening or Zone 7 natives becomes invaluable when you’re choosing between similar-looking ferns.
Physical Work Essentials
You’ll need a quality spade or shovel, match your tool to your soil type, since digging in clay requires something sturdier than sandy loam demands. A garden fork breaks up compacted soil under tree canopies more effectively than a shovel. Add a rake for leveling, a sturdy wheelbarrow for hauling amendments, and a hand trowel for detail work around roots.
- Planning tools: measuring tape, garden hose for layout, soil test kit, graph paper or design app
- Soil preparation: compost (at least 2-3 cubic yards for a medium bed), aged leaf mold, soil amendments based on test results
- Planting supplies: mulch (shredded hardwood or pine bark, 3-4 inches deep), slow-release fertilizer, transplant solution
- Maintenance tools: pruners, garden gloves, watering wand with gentle spray
If you’re building your toolkit from scratch, browse some gardening tool ideas to find quality options that’ll last through years of shade garden evolution. Investing in durable tools now means they’ll still be sharp and reliable when you’re dividing those hostas three seasons from now.
Safety Warnings and Precautions
Before you start transforming that shady corner, take a few moments to protect yourself and your family. I learned this lesson the hard way when I discovered poison ivy winding through the pachysandra I was about to yank out with bare hands.
Walk your planned garden area slowly and look for poison ivy, poison oak, or other toxic plants that thrive in shade. These plants can cause severe skin reactions, and disturbing them releases irritating oils. If you find them, wear long sleeves, gloves, and consider professional removal rather than tackling them yourself.
Proper lifting technique matters more in shade gardens than you might think. Amending compacted soil under mature trees means moving heavy bags of compost and working in awkward positions around roots. Bend at your knees, keep loads close to your body, and take breaks. Matching your tool to your soil type reduces strain significantly.
Many popular shade plants are toxic to pets or children if ingested. Hostas can cause vomiting in dogs and cats. Hellebores, foxgloves, and lily of the valley are beautiful but poisonous. If you have curious pets or young children, research each plant’s toxicity before buying and consider fencing off certain areas. This same careful planning approach that works for square foot gardening helps you map out which plants go where based on household safety needs.
Handle soil amendments in well-ventilated areas and wear a dust mask when working with dry materials. Some organic fertilizers and mushroom compost can irritate lungs or skin in concentrated form.
Step-by-Step Design Process
Map Your Space and Light Patterns
Start by observing your shady space at different times of day, morning, midday, and late afternoon. I learned this the hard way when I planted hostas in what I thought was full shade, only to watch them scorch when afternoon sun crept in during summer.
Walk your garden area on a sunny day and note where shadows fall. Early spring light differs dramatically from summer canopy cover in Zone 7, so if possible, observe across seasons. Mark areas of dappled shade (sunlight filtering through leaves), partial shade (3-4 hours of sun), and full shade (less than 2 hours of direct light).
Measure your space with a tape measure or simply pace it out, then sketch a rough map on graph paper or use a free garden planning app. Mark existing trees with their canopy spread, noting species, oak roots tolerate underplanting better than maples. Identify structures casting shade, downspouts that create wet spots, and any slopes affecting drainage.
Watch where water pools after rain. These drainage patterns matter tremendously under tree canopies where roots compete for moisture. Your base map becomes your design foundation, preventing costly mistakes before you ever lift a shovel.
Improve Your Soil
Good shade garden soil in Zone 7 needs to drain well yet hold moisture, a tricky balance under established trees.
Start with a soil test. Your local extension office offers inexpensive kits that reveal pH and nutrient levels. Most shade perennials thrive in slightly acidic to neutral soil (pH 6.0-7.0), which is typical for Zone 7. If you’re working under mature oaks or pines, expect more acidic conditions.
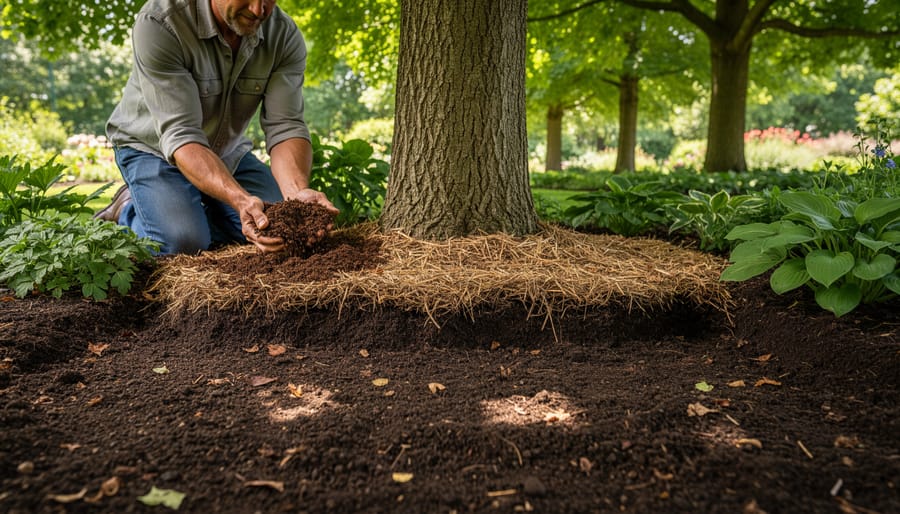
Clay is your likely challenge here. I spent two seasons fighting compacted clay in my first shade bed before I learned to dig deeper, literally. Work 3-4 inches of compost into the top 8-10 inches of soil. Add aged leaf mold if you can get it; it mimics the natural forest floor and breaks up heavy clay beautifully.
Tree roots complicate things. Don’t sever major roots or pile soil against trunks. Instead, create raised beds or mounds with a 50-50 mix of native soil and compost where roots are dense.
Poor drainage shows up as standing water after rain. If that’s your situation, consider a dry creek bed or French drain before planting. Amending won’t fix truly swampy spots, you’ll need mechanical drainage solutions first.
Choose Your Plant Palette
Now comes the fun part: choosing plants that will thrive in your Zone 7 shade. I approach this like assembling a cast of characters, each plant plays a role, and together they create a garden that shifts and surprises through the seasons.
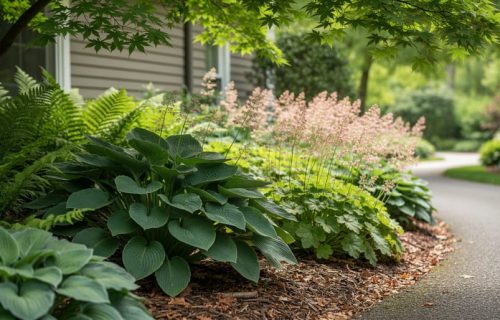
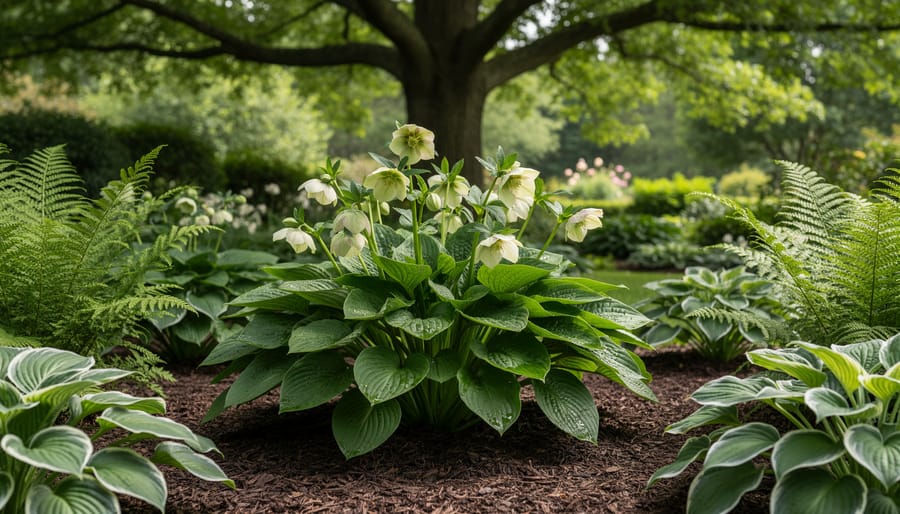
Start by thinking in layers, just like a natural woodland. Your ground layer might feature creeping phlox or wild ginger spreading beneath everything else. The middle layer, your workhorses, includes perennials like hostas (nearly foolproof in Zone 7), ferns for elegant texture, and astilbes that bloom when little else does in summer shade. Heucheras bring year-round foliage color, from burgundy to chartreuse, while hellebores flower in late winter when you’re desperate for something alive.
Don’t forget the canopy layer: shade-tolerant shrubs like oakleaf hydrangea or native rhododendrons provide structure and anchor your design. These woody plants give your garden bones that hold interest even in January.
For year-round appeal, mix spring bloomers (Virginia bluebells, trilliums), summer performers (Japanese forest grass, brunnera), fall color (toad lily, turtlehead), and evergreen stalwarts (Christmas fern, liriope). I learned this the hard way after creating a garden that peaked gloriously in May then looked tired by August.
Choose plants suited to your specific shade type, dappled shade opens more possibilities than dense, dry shade under a mature maple. Zone 7’s relatively mild winters let you experiment with plants that wouldn’t survive further north, but our humid summers mean selecting mildew-resistant varieties matters more than in drier climates.
Create Focal Points and Pathways
Even a well-planted shade garden can feel directionless without strategic focal points that draw the eye and pathways that invite exploration. In my own Zone 7 garden, a simple stone bench tucked beneath a dogwood completely transformed a forgotten corner into the space I visit most.
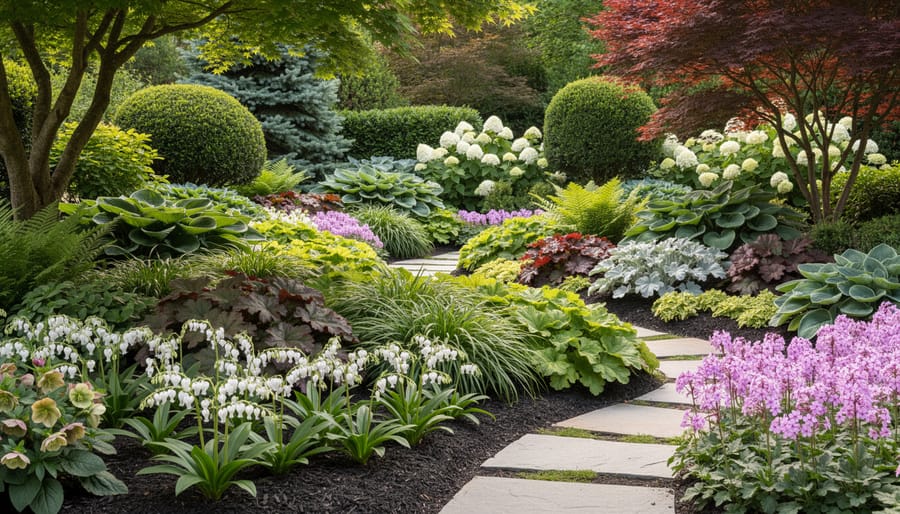
Start by identifying natural viewing angles, from your deck, kitchen window, or main entrance, and position a focal element there. A weathered urn planted with white caladiums, a birdbath surrounded by variegated hostas, or a sculptural Japanese maple creates instant visual anchor points. In shade, lighter elements matter tremendously. Choose cream-colored ornaments, pale stone, or plants with white flowers and silver foliage to reflect available light and prevent the space from feeling cave-like.
Pathways serve dual purposes: they guide movement and define planting beds. Crushed stone or light-colored gravel works beautifully in Zone 7 shade gardens, staying visible even under tree canopies and draining well during our humid summers. Stepping stones set in creeping Jenny or moss create informal flow. Keep paths at least 30 inches wide for comfortable passage, and let them curve gently rather than cutting straight lines, the slight mystery of what’s around the bend makes small spaces feel larger.
Position your showiest specimens, perhaps a white-blooming oakleaf hydrangea or clump of ‘August Moon’ hosta, at pathway intersections or terminus points where they’ll command attention without competing.
Install in the Right Sequence
Start with hardscape, paths, edging, or any decorative elements, before a single plant goes in the ground. I learned this the hard way after trampling newly planted hostas while wrestling with stepping stones. Once hardscape is set, you’ll protect your plants and avoid compacting soil around their roots.
Next, install larger shrubs and any woody specimens. These anchor your design and need the most root space. Dig holes twice as wide as the root ball but no deeper, and position plants at the same depth they grew in their containers. In Zone 7’s clay-heavy soils, avoid planting too deep or water will pool around the crown.
Move to perennials once shrubs are placed. Follow spacing recommendations on plant tags, crowding invites fungal issues in our humid summers, and shade plants need air circulation. Space hostas 18 to 24 inches apart, ferns 12 to 18 inches, depending on mature size.
Finish with ground covers to knit everything together, then apply two to three inches of shredded hardwood mulch around all plantings. Keep mulch an inch away from plant stems to prevent rot.
Water thoroughly at planting, soaking the entire root zone. For the first few weeks, check soil moisture every few days, shade doesn’t mean plants need less water during establishment.
Establish a Seasonal Maintenance Plan
Zone 7’s distinct seasons make a maintenance rhythm essential for shade garden success. In spring (mid-March through May), clear winter debris, cut back dead perennial stems, and top-dress beds with fresh compost before new growth emerges. Summer demands consistent watering, shade plants still need moisture during July and August heat, especially in their first year. Check soil two inches down; if it’s dry, water deeply once weekly rather than frequent shallow spritzing.
Fall is your planting and dividing sweet spot in Zone 7. September through early November offers mild temperatures and reliable rain, giving perennials like hostas and ferns time to establish roots before winter without summer stress. Divide overgrown clumps now, refresh mulch to three inches, and leave seed heads on hellebores and native plants for winter interest and wildlife.
Winter requires minimal effort, Zone 7’s moderate cold rarely demands protection except for marginally hardy newcomers, which benefit from an extra mulch layer their first year.

Best Shade Plants for Zone 7 Gardens
Choosing the right plants makes all the difference in a Zone 7 shade garden. I learned this the hard way after planting shade-lovers from a Northern catalog that couldn’t handle our humid summers, they melted by July. Now I focus on proven performers that thrive in our specific conditions: plants that tolerate both our occasional winter dips to 0°F and our steamy August afternoons.
Spring Bloomers That Shine Early
Hellebores are my go-to for late winter and early spring color. These evergreen perennials bloom from February through April, shrugging off frost and providing flowers when little else is awake. Pair them with native Virginia bluebells, which carpet shaded areas with sky-blue flowers in April before going summer-dormant (leaving room for later bloomers). Epimediums offer delicate fairy-wing flowers in spring and attractive foliage all season, perfect for dry shade under mature trees where nothing else cooperates.
Summer Foliage Stars
When spring bloomers fade, foliage plants carry the show. Hostas remain the workhorses of Zone 7 shade gardens, with varieties ranging from miniature ‘Blue Mouse Ears’ to giant ‘Empress Wu’. Select slug-resistant types with thicker leaves for less frustration. Japanese painted ferns bring silvery elegance, while heucheras (coral bells) offer maroon, lime, or apricot foliage that looks fresh from May through frost. For texture contrast, add ‘Autumn Fern’ with its coppery new growth, or the bold leaves of ligularia in spots with consistent moisture.
Evergreen Structure Plants
Give your garden winter bones with evergreen selections. Christmas fern stays green year-round and tolerates deep shade. Lenten rose (another hellebore) provides structure and late-winter blooms. For shrub layer, leucothoe offers arching branches with bronze winter color, while dwarf rhododendrons bloom spectacularly in spring and hold their leaves through winter.
Native Champions
Native plants handle Zone 7’s variability best. Solomon’s seal arches gracefully with white bell flowers. Foamflower spreads as a groundcover with spring blooms. Wild ginger covers bare ground under trees. These natives support local pollinators and require minimal intervention once established, exactly what a low-maintenance shade garden needs.
Verification and Next Steps
Your shade garden needs about six weeks to show its true character. New plants often look stressed initially, that’s normal as roots establish, but by late spring you should see fresh growth and stronger stems.
Watch for these positive signs: leaves developing richer color rather than staying pale, plants maintaining compact growth rather than stretching toward light, and consistent new foliage appearing through the growing season. Mulch that stays moist but not soggy indicates good drainage. If you planted in fall, spring emergence confirms winter survival.
First-year troubles usually signal fixable issues. Yellowing leaves with poor growth often mean drainage problems, add more organic matter and consider creating subtle berms to improve water flow. Plants elongating toward light or producing sparse foliage weren’t matched to your shade level; move them to brighter spots and replace with more shade-tolerant options. Ragged holes in hosta and ligularia leaves? Slugs. Set beer traps or sprinkle diatomaceous earth around susceptible plants.
Resist the urge to overhaul things before fall. Spring plantings need summer to establish; fall plantings need the following spring. I once replanted an entire bed in June because it looked sparse, only to realize the perennials were just slow starters that would have filled in beautifully by August.
After your first full season, evaluate honestly. Does the garden provide interest across spring, summer, and fall? Are there bare patches or overcrowded areas? Zone 7’s long growing season lets you divide and replant perennials in early fall, giving them months to settle before winter.
Your shade garden will evolve naturally as plants mature and your vision sharpens. Trust the process.
Common Questions About Zone 7 Shade Gardens
Shade gardening in Zone 7 comes with its own quirks and challenges, and over the years I’ve heard the same questions crop up repeatedly from gardeners in this region. Here are answers to the most common concerns that’ll help you avoid trial-and-error headaches.
When’s the best time to plant a shade garden in Zone 7?
Fall planting (September through October) is ideal because cooler temperatures and increased rainfall help plants establish strong roots before winter. Spring works too, but you’ll need to water more diligently through the first summer.
How do I handle dry shade under mature trees?
Choose drought-tolerant shade plants like epimedium, Solomon’s seal, and hardy geraniums. Add a thick layer of compost when planting to improve water retention, and mulch generously to conserve moisture, competing with tree roots is a marathon, not a sprint.
What’s the best approach for shade gardening in Zone 7’s heavy clay soil?
Work in plenty of compost and avoid tilling when soil is wet, which creates concrete-like clumps. Raised beds or berms can bypass clay issues entirely, and many shade plants (hostas, astilbes, native ferns) actually tolerate clay better than sandy soil once established.
Can I get color in a Zone 7 shade garden beyond spring?
Absolutely, heucheras offer colorful foliage all season, astilbes bloom in summer, and toad lilies flower in fall. Pair these with variegated hostas and the chartreuse foliage of plants like Bowles’ golden sedge for year-round visual interest.
Don’t let deer concerns stop you from creating your shade retreat, either. While they do browse hostas and other favorites, Zone 7 offers plenty of deer-resistant shade options like hellebores, ferns, lamium, and Japanese forest grass. Combining these with strategic placement of more tempting plants near the house (where deer are less bold) creates a practical compromise. The key is working with your specific conditions rather than fighting them, every challenging shady spot has plants that’ll thrive there.
Designing a shade garden in Zone 7 isn’t just about working around limitations, it’s about discovering the unique beauty that thrives where sunlight doesn’t reach. These cooler, sheltered spaces reward patience and observation with lush textures, surprising blooms, and a tranquility that sun-baked beds rarely offer.
Start simple. Spend a few weeks watching how light moves through your space before you buy a single plant. Sketch your ideas on paper, choose three or four reliable plants from the list we’ve covered, and build from there. Fall remains the ideal time to begin in Zone 7, giving roots months to establish before summer stress, but spring works too if you’re committed to consistent watering.
I’ve watched struggling, forgotten corners transform into my favorite garden rooms, places where I linger longer than I planned, where the soft greens and gentle movement calm everything down. Your shaded space holds that same potential.
Don’t wait for perfect conditions or a complete plan. Improve the soil, plant something proven, and let the garden teach you what it needs. The shade has been waiting. It’s ready to become something beautiful.